Front camera 2K (R588) / 4K upscaled (R688)Full HD rear cameraWi-Fi + Samsonix Pro appParking mode with time-lapseHebrew voice promptsBattery protection
Model R588 / R688 · Firmware 1.0.2.0.20261010 www.samsonix.co.il
This manual covers the R588 (2K front camera, 2560×1440 at 30 fps) and the R688 (front recording 3840×2160 — 4K, upscaled from 2560×1440 — at 25 fps). The two models use separate firmware builds with the same version number 1.0.2.0.20261010; they differ in front-camera resolution, frame rate and bitrate, the logo in the video stamp and the Wi-Fi network name. What has changed since firmware 1.0.1.9: section 12, «What’s new in firmware 1.0.2.0».
1 What’s in the box
After unpacking, check that the package contains:
Dash camera R588 / R688 — main unit
Rear camera
Extension cable for the rear camera
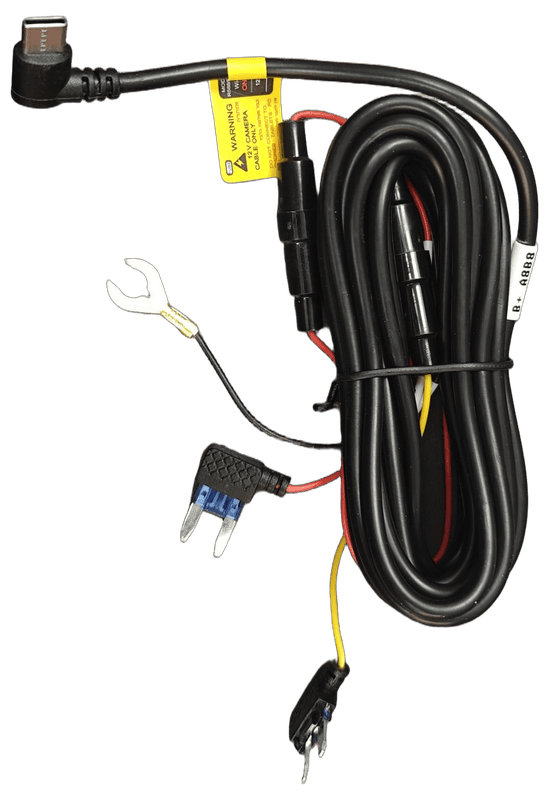
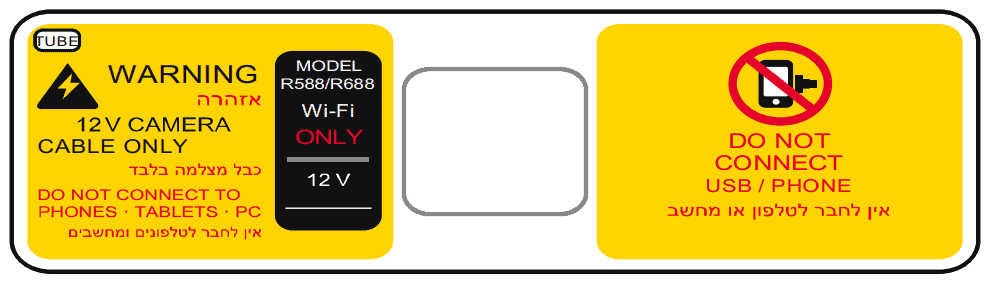
12 V power cable (B+ / ACC / GND) with fuses, white tube marker and the «R588/R688 Wi-Fi ONLY» tag
Electrostatic sticker (for the windscreen)
Card with links to the documentation (QR code)
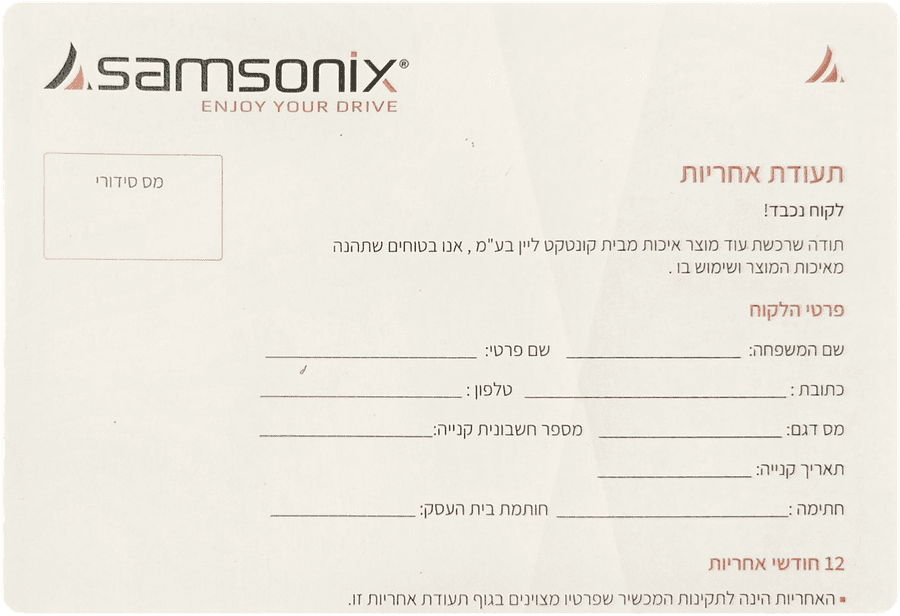
Warranty card
The package contains the 12 V power cable only (B+ / ACC / GND) — there is no separate power adapter. Never plug this cable into a phone, tablet, computer or USB charger (see the tag). Power options and how to identify the cable — section 4, «Power connection».
Tag on the power cable of the R588 / R688 (Wi-Fi version)
2 Camera overview
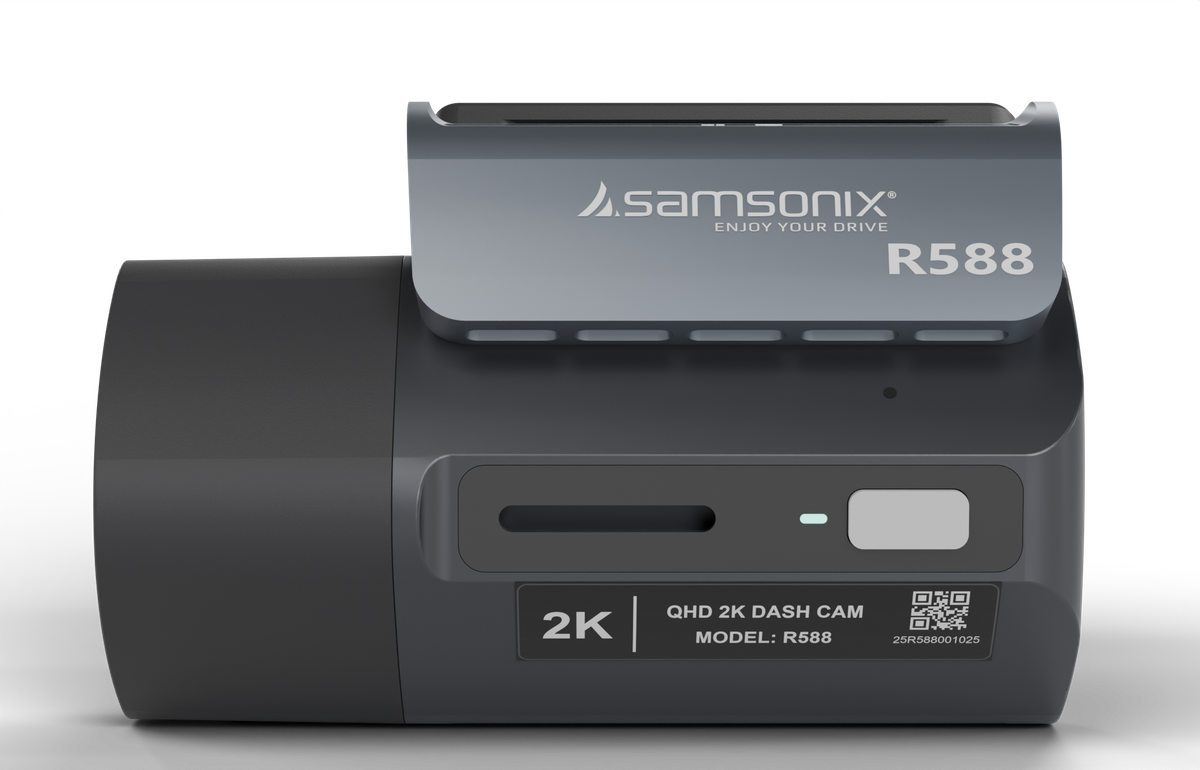
The camera has no screen: it is operated with the app and one button. The numbers on the pictures follow the vendor drawing (legend below).
Drag to rotate; mouse wheel or pinch to zoom.
3D model of the R588 / R688 camera
Interactive 3D model of the camera — the numbers match the vendor drawing legend below (hover a number for its name).
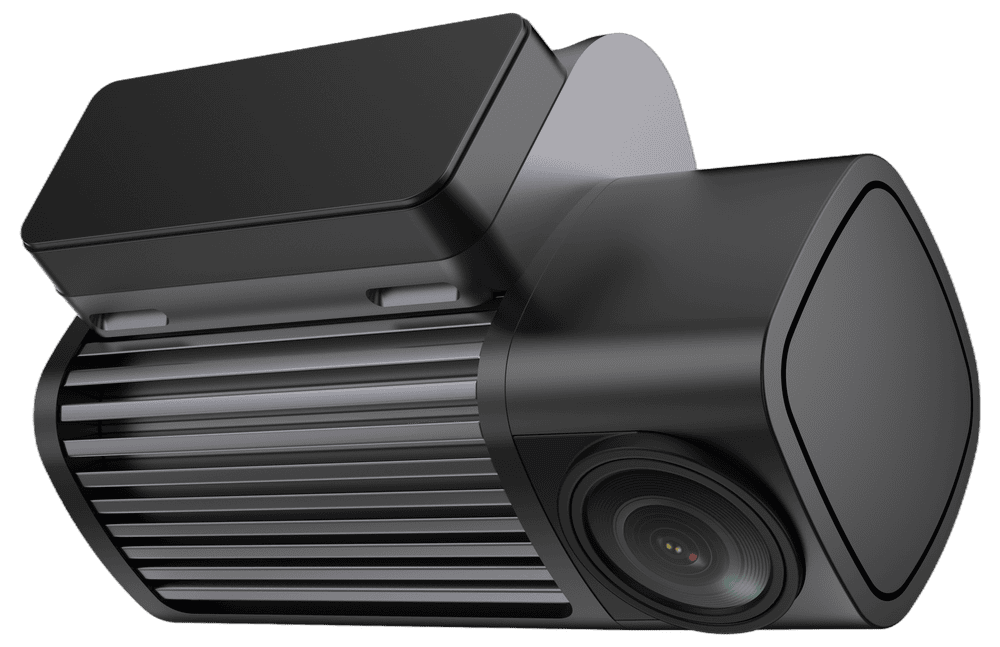
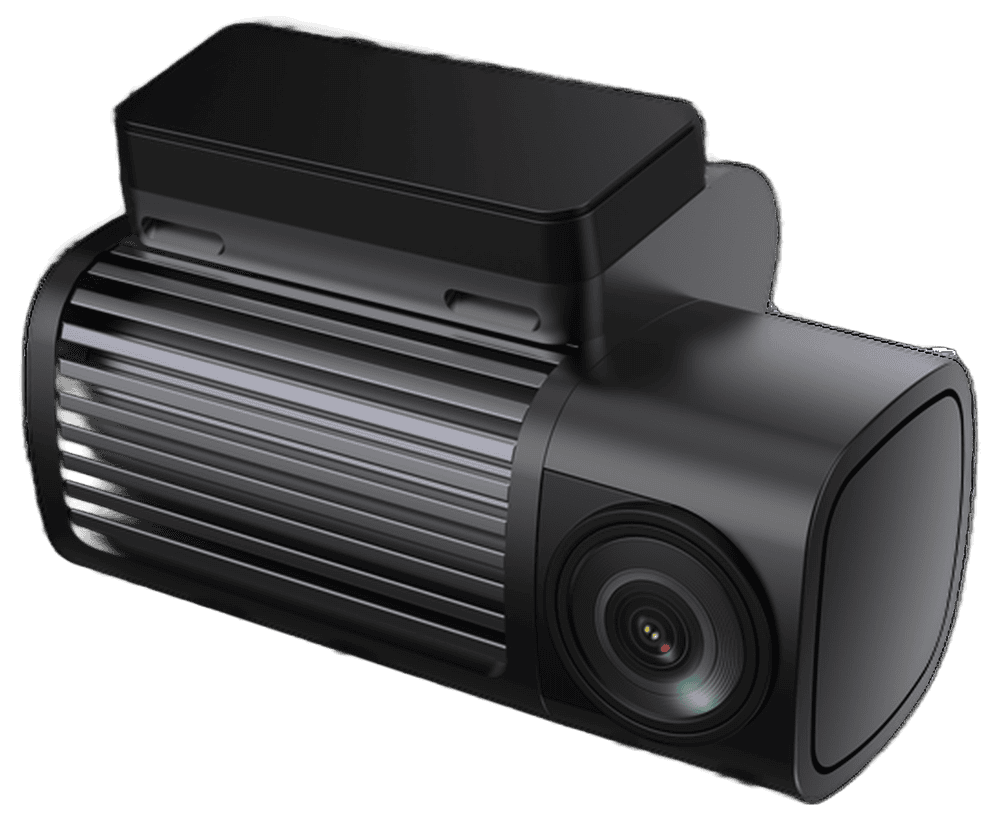
General view — mount, ventilation grille and lens
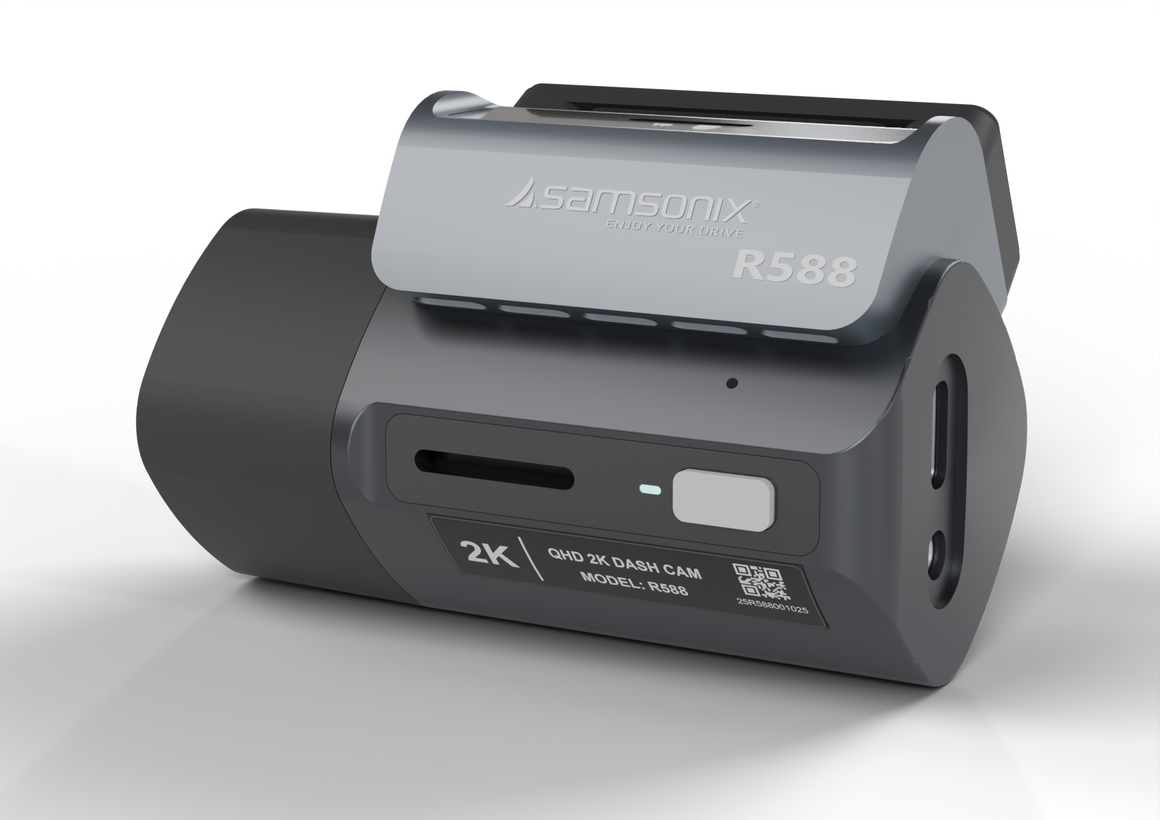
General view from the driver’s side
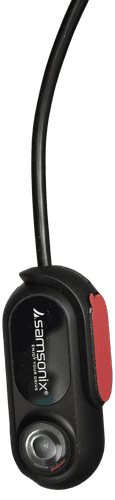
Rear camera
234
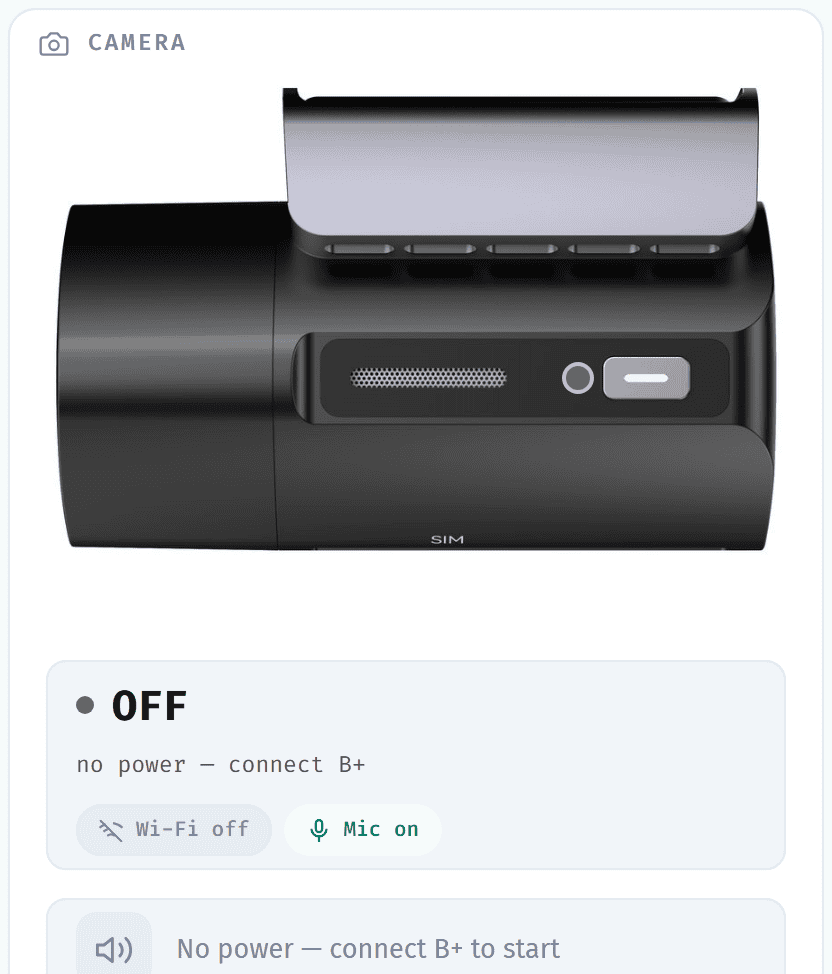
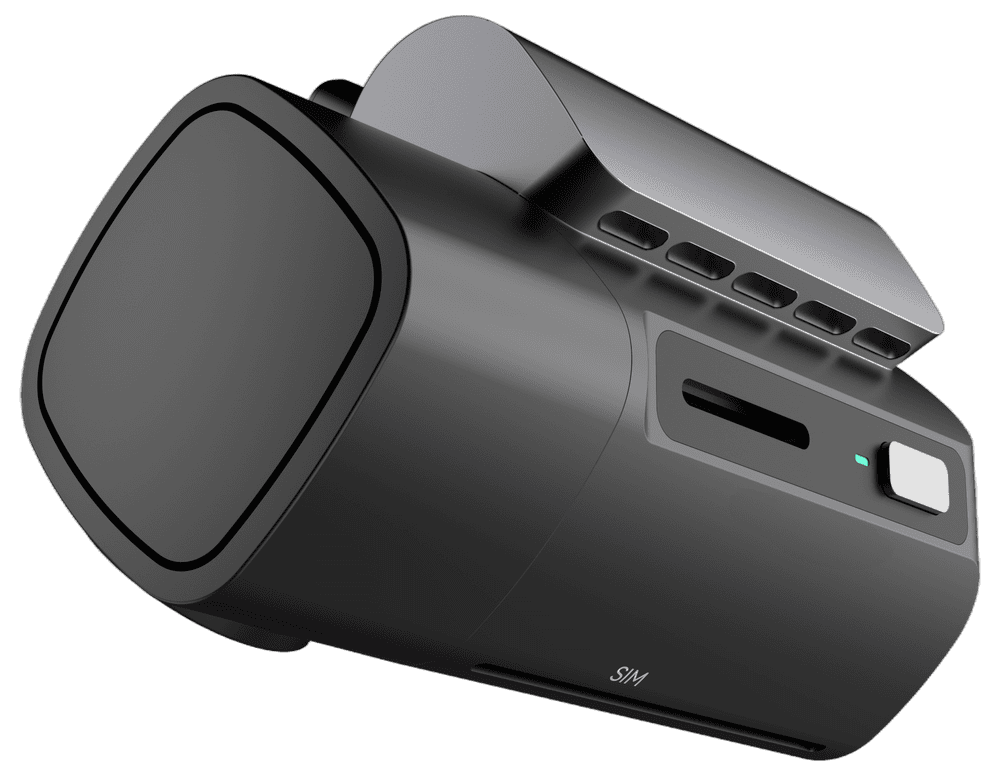
Side facing the driver — speaker hole (2), indicator light (3), button (4)
23457
Connector end — power connector USB Type-C (5) and rear camera connector (7)
1
Front (towards the road) — front camera lens (1)
6234
microSD card slot (6) — on the top of the camera under the mount, between the speaker/button side and the adhesive pad; the slot is marked «TF». Slide the camera off the mount to reach it. Render from the 3D model; 2–4 for orientation.
Vendor drawing, legend 1–7. The microSD card slot (6) is not visible on the renders — see the drawing. The microphone is built into the housing.
No.
Part
1
Front camera lens
2
Speaker
3
Indicator light (LED)
4
Button (lock video / Wi-Fi / factory reset — see «Button and LED indicator»)
5
Power connector (USB Type-C)
6
microSD (TF) card slot
7
Socket for the rear camera cable (AV-IN) — the rear camera is a separate unit in the box, connected via the extension cable
Rear camera
Lens
Rear camera — general view and lens
Rear camera as supplied: a short fixed cable comes out of the body — plug it into the extension cable, and the extension cable into the rear camera connector (7); adhesive pad on the back
3 Safety instructions
To prevent damage or injury, read the following carefully before operating the device:
The product can be installed in any vehicle with a 12 V electrical system and negative ground on the chassis.
Do not connect the device to a voltage higher than the one stated on it.
Make sure the vehicle manufacturer permits the installation of this product in the vehicle.
When installing, make sure every wire is connected firmly and insulated properly.
Because of its technical nature, we strongly recommend that the product is installed by a professional certified installer or an authorised dealer. To find the nearest installer, open the Samsonix website and choose «Authorised dealers» (משווקים מורשים).
Switch the device off if it emits smoke, an unusual smell or noise.
Never disassemble the camera or the power cable (fuse holders).
⚠ Caution! Disconnect the negative terminal of the vehicle battery before working on the electrical system. A short circuit can overheat the vehicle wiring and cause a fire or battery explosion. Avoid piercing the wires of the vehicle safety systems (airbags etc.) — they may trigger during installation. Note: disconnecting the battery may erase programmed memories (vehicle computer, seat memory) and activate the radio code — make sure the radio code is available.
Precautions
Use only the supplied 12 V cable marked «R588/R688 Wi-Fi ONLY» for the vehicle connection (section 4, «Power connection»); cables of other cameras do not fit, and this cable must not be plugged into phones or USB chargers.
Do not use the camera in humid environments or above its operating temperature. Avoid leaving the vehicle parked in direct sun with the camera exposed — this extends the product life.
Keep the lenses clean to avoid distorted or low-quality images.
4 Installation and power
Power connection
Main way — the supplied 12 V cable (3 wires):B+ (constant 12 V), ACC (ignition) and GND (earth). With it all modes are available. Powering from a 5 V USB charger is allowed (through the camera’s power connector; a USB-C cable is not included): the camera records in driving mode, but parking mode, time-lapse, impact recording with the ignition off and battery protection do not work — the camera simply records while power is present.
The camera senses the ignition through the ACC wire: ACC ON = driving mode, ACC OFF = parking mode. Without the ACC wire (2-wire or 5 V USB connection) parking operation based on the ignition state is unavailable, and when power is removed recording stops.
Battery protection (low-voltage cut-off) works only on 12 V vehicle power through the supplied cable with the ACC wire connected; on 5 V USB power it is not active.
The supplied 12 V cable is intended for the R588 / R688 (Wi-Fi) only: it has a white tube marker and the yellow tag «R588/R688 · Wi-Fi ONLY · 12 V». The warning on the tag («12V CAMERA CABLE ONLY — DO NOT CONNECT TO PHONES · TABLETS · PC / DO NOT CONNECT USB / PHONE») means this cable must never be plugged into a phone, tablet, computer or USB charger. Cables of other Samsonix cameras, including similar-looking models in the same housing, have a different pin-out: they do not fit and must not be used. There is no power adapter in the package.
Tag on the power cable of the R588 / R688 (Wi-Fi version)
⚠ Have the hardwire kit installed by a qualified installer. Incorrect wiring can damage the vehicle electrical system and voids the warranty.
Installation steps
Switch the engine off.
Insert the microSD card into the card slot (6) while the camera is off (see section 4, «microSD memory card»).
Fix the camera to the windscreen with the mount, preferably behind the rear-view mirror. The camera must not block the driver’s view or sit in an airbag deployment area, and the lens should look through the part of the windscreen cleaned by the wipers.
Plug the rear camera’s short cable into the extension cable, and the extension cable into the rear camera connector (7). Route the cable hidden under the headliner and trim panels, away from airbags and moving parts (doors, seats, pedals). Fix the rear camera with its adhesive pad on the inside of the rear window.
Connect the power cable to the vehicle electrical system: B+ (constant 12 V), ACC (ignition) and GND. Use only the supplied cable marked «R588/R688 Wi-Fi ONLY» (see «Power connection» above).
Plug the cable’s USB Type-C connector into the power connector (5). The cable can be routed along the edge of the windscreen.
Adjust the lens so that the sky takes about the top third of the image.
Start the engine and check the installation: after about 10 s the camera plays the start melody (on some starts also «מצב נסיעה»), says «ההקלטה החלה» and the LED starts blinking — recording is running. Then connect the app and check the live view of both cameras.
microSD memory card
Requirements: microSD card Class 10 / U3 (V30), capacity 8 GB to 512 GB.
The camera uses its own card format (FAT32 with 64 KB clusters) and formats the card itself. The camera may automatically format cards with an unsupported file system (for example exFAT — new cards of 64 GB and larger), an incompatible file-system layout (for example FAT32 formatted on a computer) or certain file-system errors. Formatting erases all files without asking. Copy all important files before inserting a card. There is no need to format the card on a computer.
Insert the card while the camera is off. At the first start with a new card the camera may say «תקלה בכרטיס הזיכרון» (memory card error) several times and the app may show «please insert a tf card». This message does not identify the cause: the card may be absent, not ready (for example being formatted) or faulty. Wait for recording to start (the LED blinks); if it does not, check or replace the card. When the camera formats a card automatically, it says «מאתחל את כרטיס הזיכרון» (initialising the memory card).
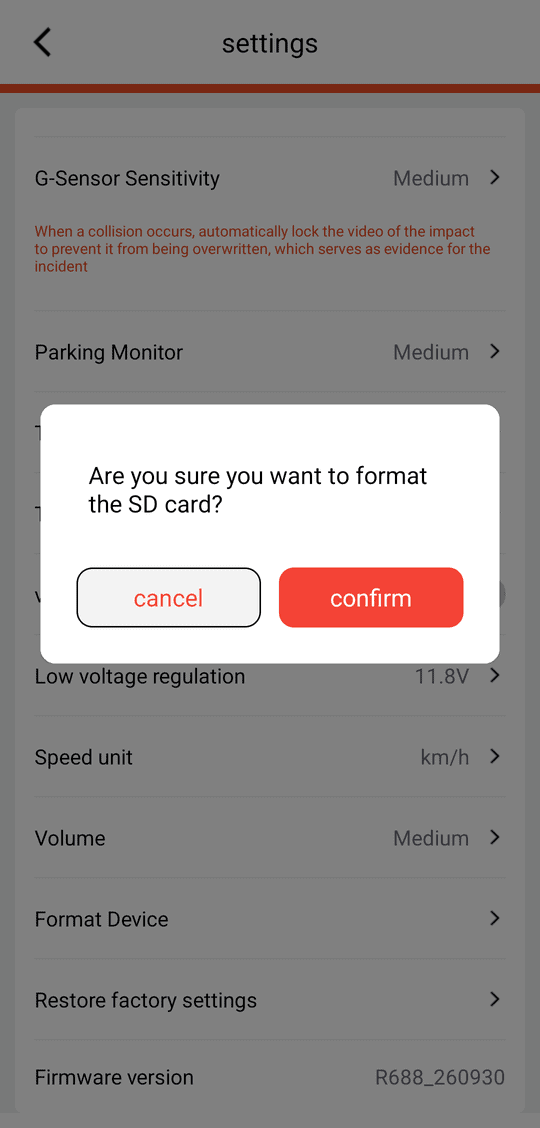
Manual formatting: SAMSONIX PRO → Settings → Format Device → confirm — all recordings are deleted; the camera says «מאתחל את כרטיס הזיכרון» (initialising the memory card) and recording resumes after about 10 s. Use it if recording did not start (LED not blinking) or the card is not recognised. If the item is unavailable («please insert a tf card») or formatting does not help, replace the card. A slow or worn card can also interrupt recording.
When formatting, the camera creates one FAT32 volume with 64 KB clusters. A single video file is limited to 4 GB — this is never reached, because recordings are split into short segments.
✔ Any formatting — automatic or from the app — erases all recordings, including Event clips. Always copy the files you need first.
5 Connecting to your phone
The camera creates its own Wi-Fi network; the phone connects to it directly — no internet or router is needed. The app is SAMSONIX PRO (App Store / Google Play). A video guide to the app is at https://samsonix.co.il/downloads (scroll to the bottom of the page).
The stores also list other Samsonix apps (SAMSONIX LIVE, SAMSONIX R665 and others) — for the R588 / R688 you need SAMSONIX PRO.
Start the engine (ignition on). After about 10 s the camera plays the start melody (on some starts also «מצב נסיעה») and says «ההקלטה החלה» (recording started).
Switch Wi-Fi on: hold the camera button for 3–9 s and release — the camera says «וויפיי פעיל» (Wi-Fi on). Wi-Fi does not switch on by itself, neither at start-up nor when the ignition is switched on.
In the phone’s Wi-Fi settings connect to the network R588_XXXXXX (R688: R688_XXXXXX; XXXXXX = the last 6 characters of the camera’s MAC address, e.g. R588_D26C69), password 12345678 (factory default). The phone reports «connected, no internet» — that is correct; if asked, choose to keep the connection.
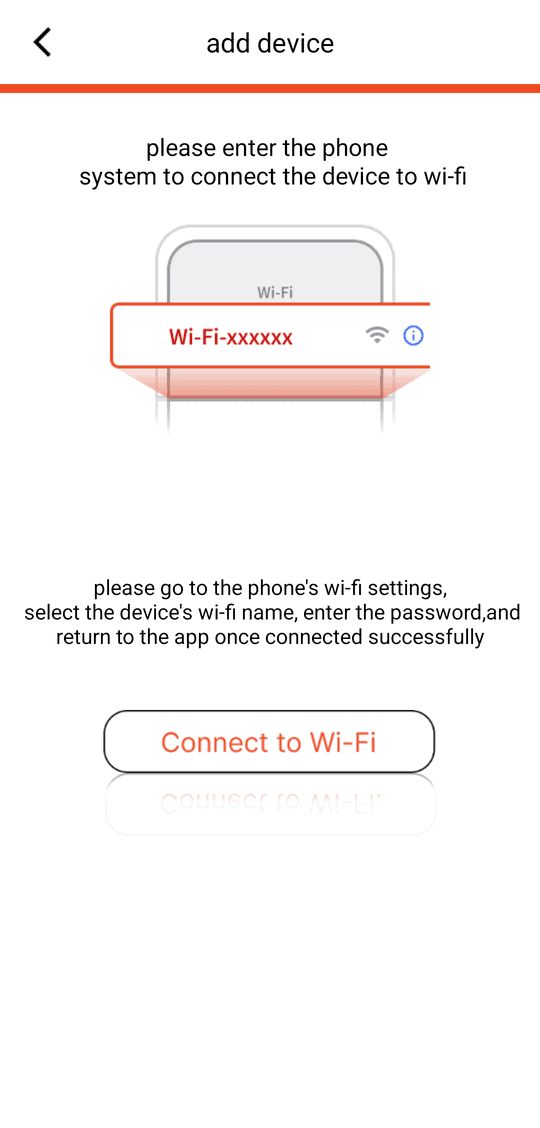
Open SAMSONIX PRO and tap + at the top of the screen (add device). If the phone is not yet connected to the camera, tap Connect to Wi-Fi — it opens the phone’s Wi-Fi settings — and return to the app afterwards.
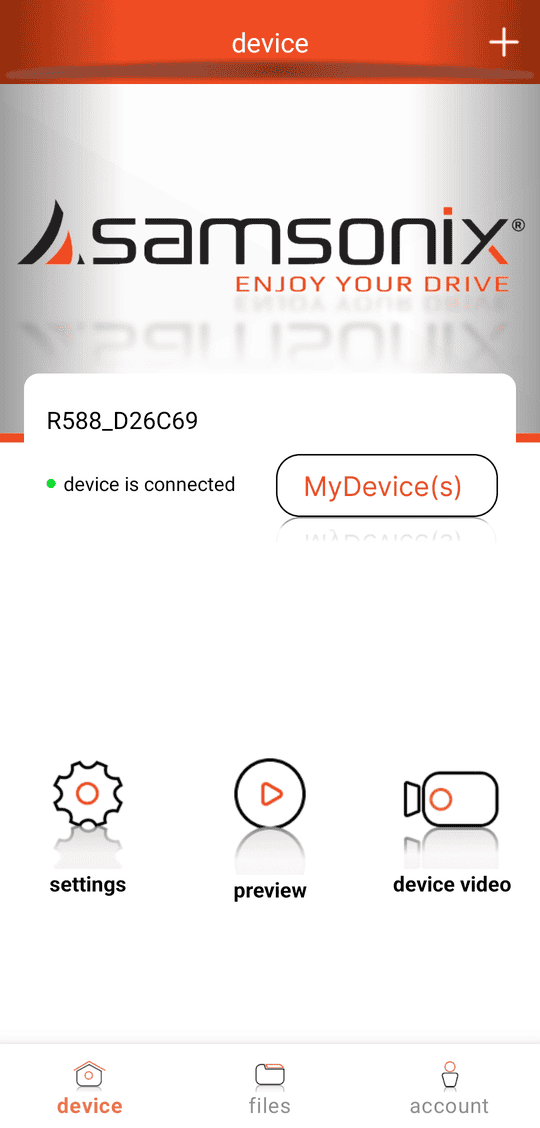
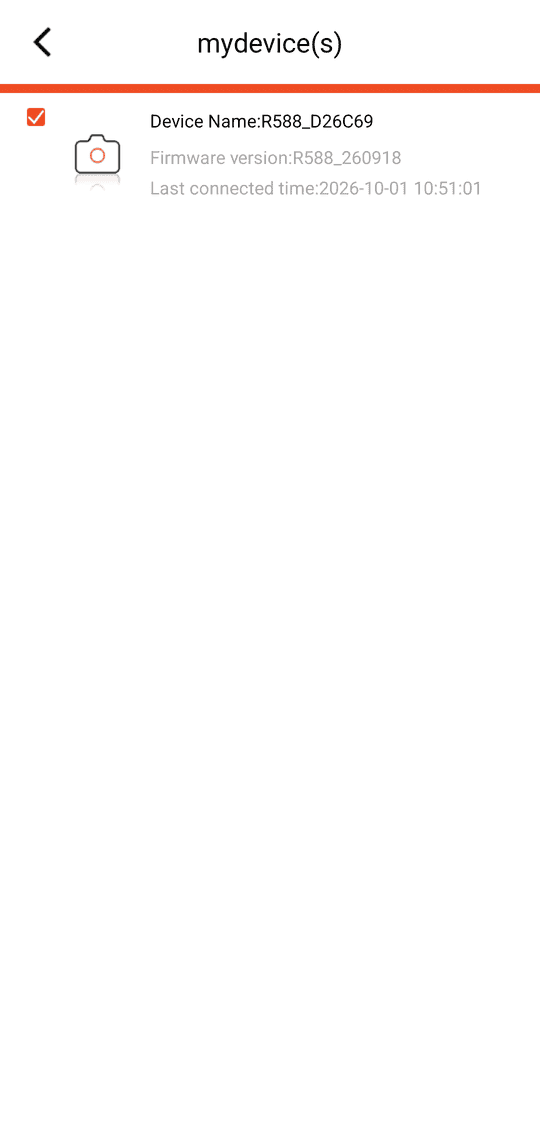
The camera appears on the device screen as R588_XXXXXX / R688_XXXXXX — device is connected (camera address 192.168.0.1). Registered cameras are listed under MyDevice(s).
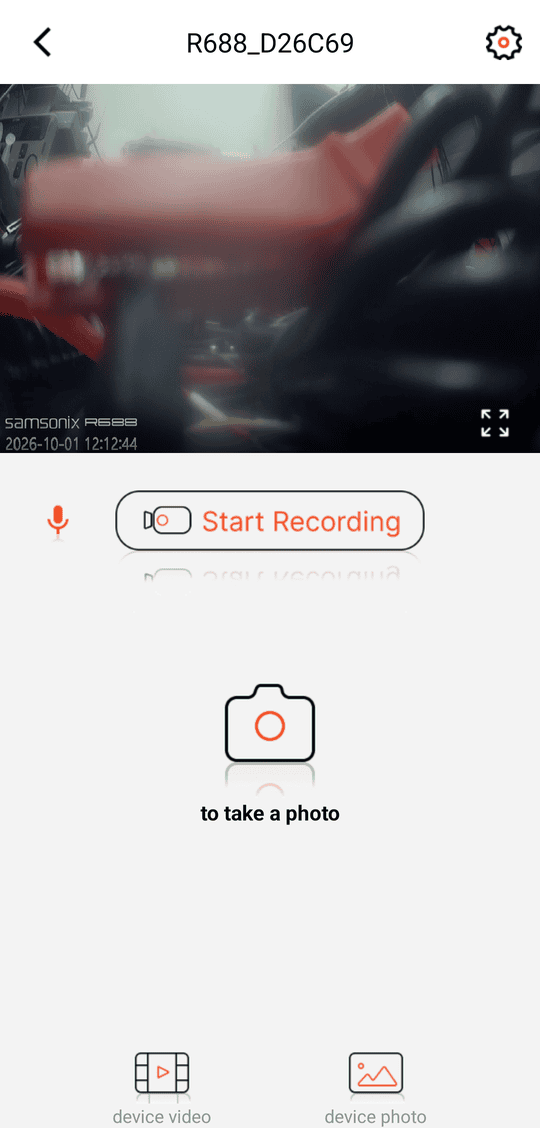
The device screen has three buttons: settings, preview (live view with Stop Recording / start, microphone and photo buttons) and device video (recordings on the card). Bottom tabs: device, files (downloads on the phone), account. Recording continues while you watch the preview.
add device — «Connect to Wi-Fi» opens the phone’s Wi-Fi settings
device screen: camera connected; settings / preview / device video
preview: live view, Stop Recording, microphone and photo buttons
When Wi-Fi is on and off. Wi-Fi is off after every start of the camera and stays off when the ignition is switched on; it is switched on only with the button (hold 3–9 s and release — «וויפיי פעיל»). The same press switches it off again («וויפיי כבוי»). Wi-Fi switches off about 2 s after the ignition is switched off (parking mode). If no phone is connected to the camera, Wi-Fi switches itself off after about 5 minutes (the camera checks every 5 minutes). To use the app again, switch Wi-Fi on with the button.
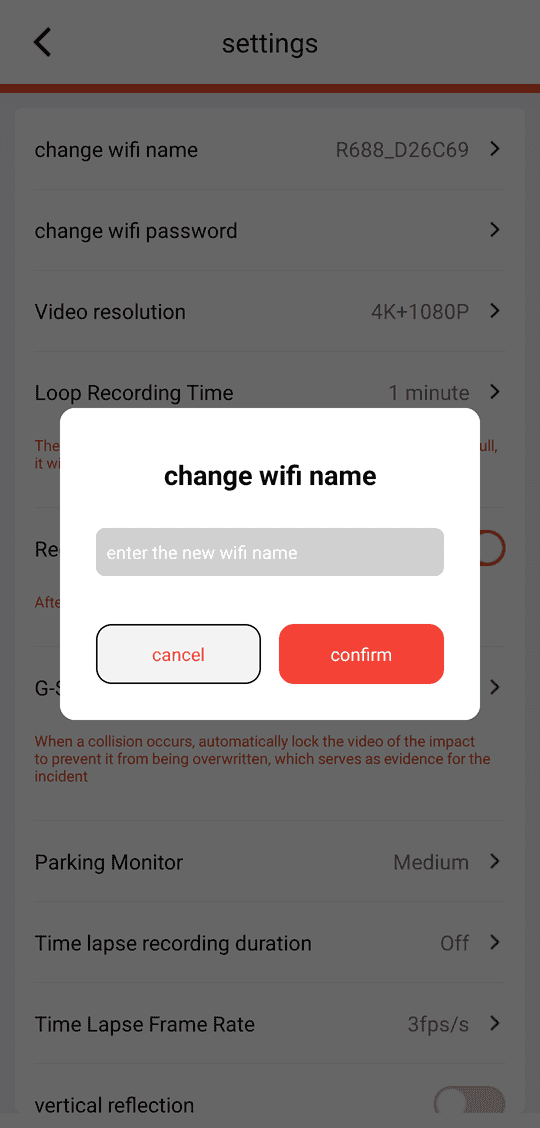
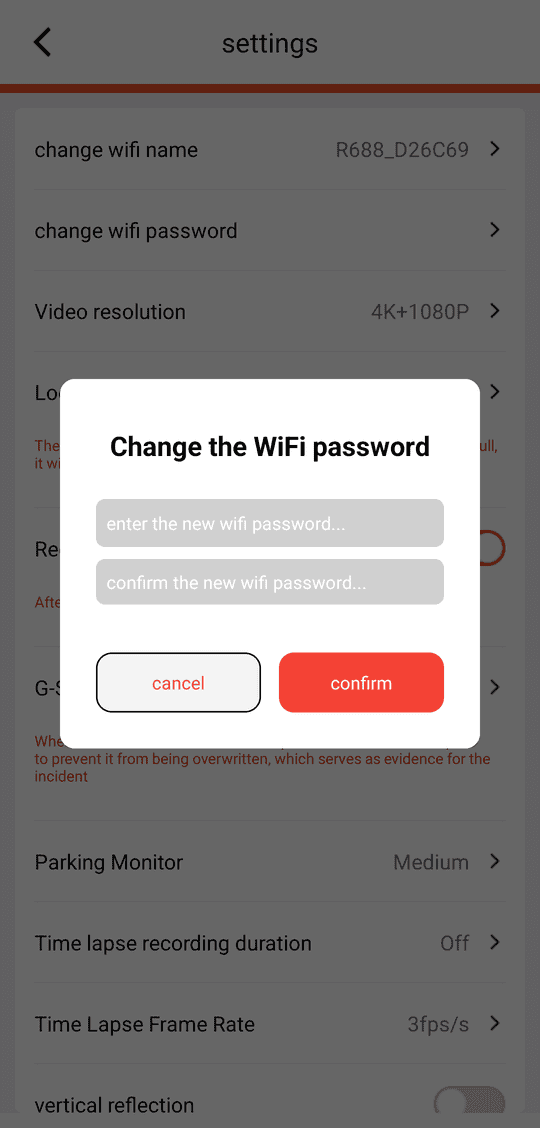
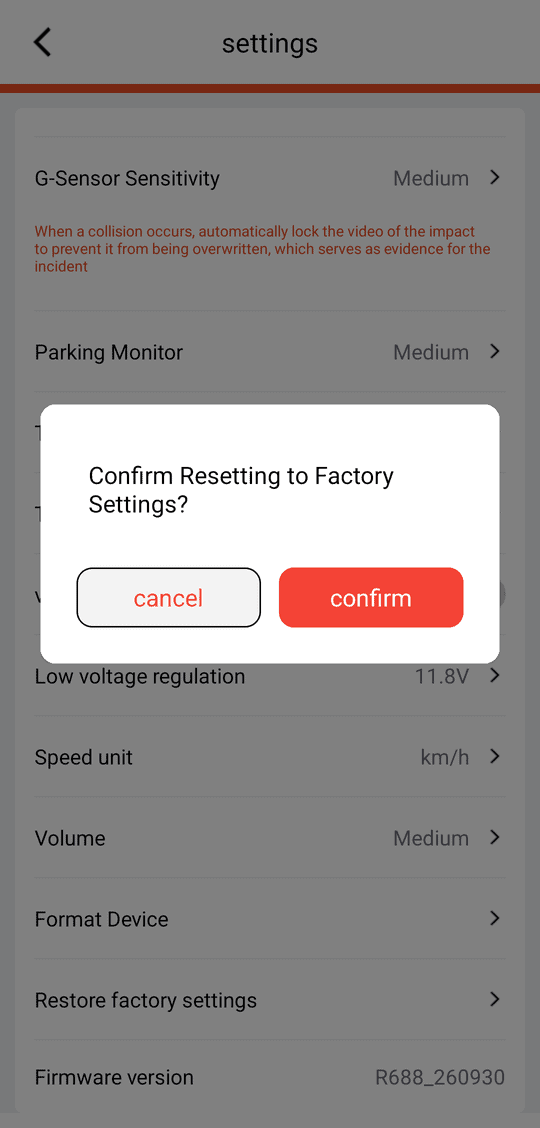
The Wi-Fi name and password can be changed in the app (Settings → change wifi name / change wifi password). Write the new password down: if it is lost, a factory reset (Settings → Restore factory settings, or hold the button for more than 9 s and release) returns the factory password 12345678.
SAMSONIX PRO sets the camera date and time from the phone automatically every time it connects to the camera. Connect the app after installation so that recordings carry the correct time. If the camera clock is not set, after switching on the camera says «יש לסנכרן את השעון עם הטלפון» (synchronise the clock with the phone).
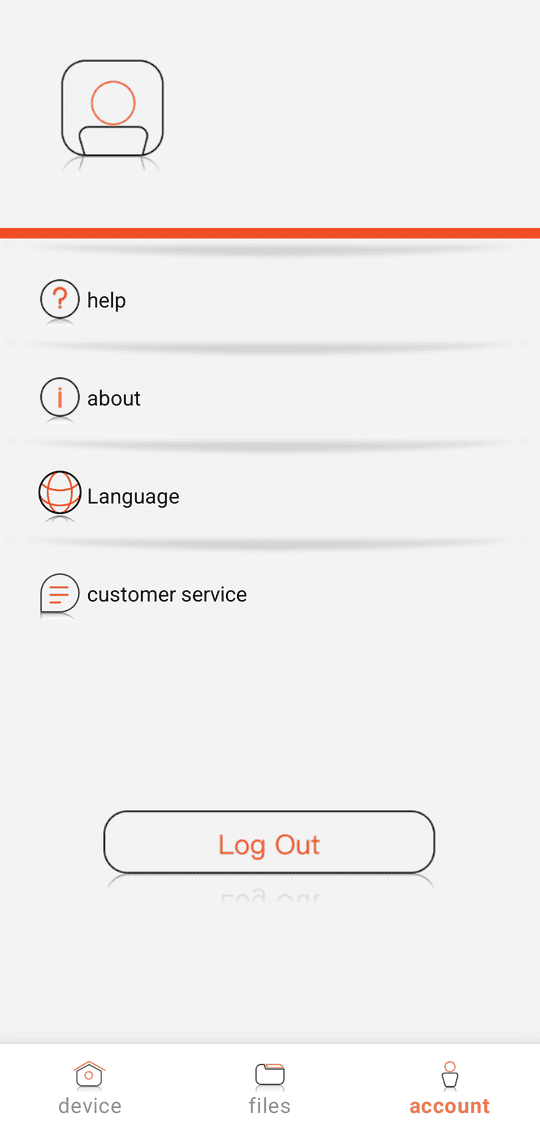
The account tab has help, about, Language (app language) and customer service.
MyDevice(s): registered cameras with their firmware version
account: help / about / Language / customer service
account → Language: עברית (Hebrew) / Russian / english — choose and press save
The app language is set in account → Language (Hebrew / Russian / English) and applies to all menus; this manual quotes the menu names in its own language.
6 Operating modes
The camera has no power button. Its mode is decided by the two power wires: B+ (always on) and ACC (ignition), which the camera checks once per second. On 5 V USB power (no ACC) only driving mode is available — see section 4, «Power connection».
✔ Try it virtually. An interactive online simulator of the camera logic shows step by step what the camera does in each mode: ignition on/off, parking monitor, time-lapse, impacts, battery protection, voice prompts and the app screens. It runs in a web browser, nothing to install: https://alexgavs.github.io/r588-emulator/ (simulator interface in English).
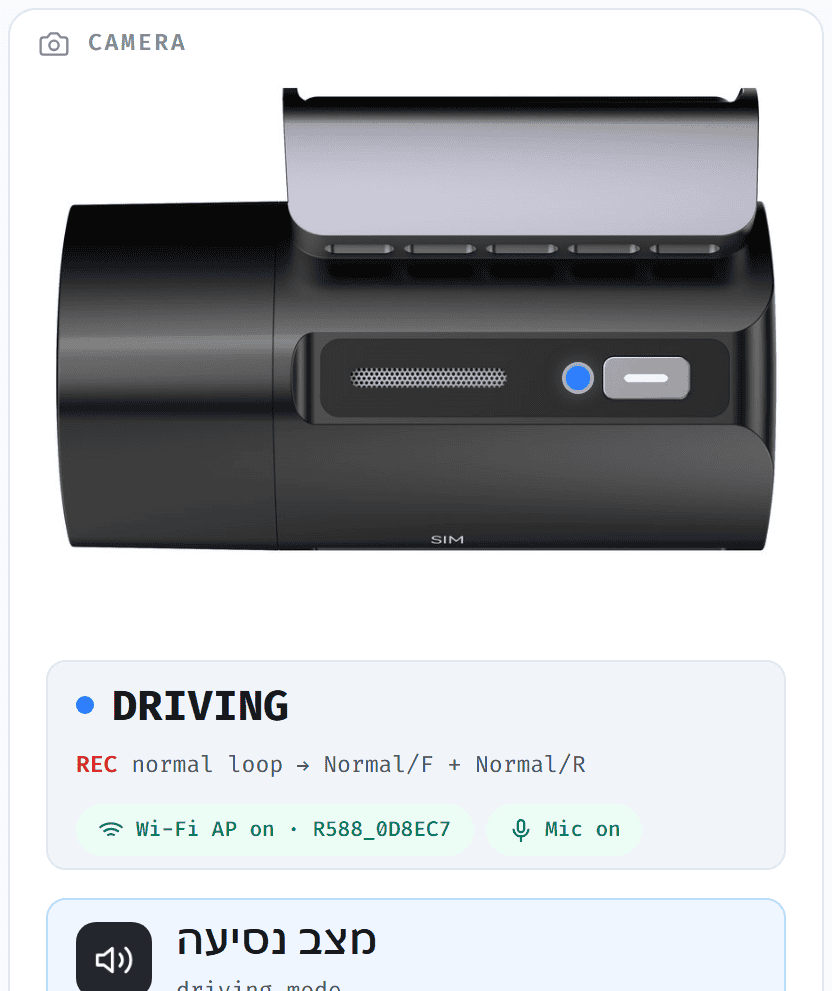
Starts automatically about 10 s after the ignition is switched on: start melody, on some starts «מצב נסיעה», then «ההקלטה החלה» (recording started). If «מצב נסיעה» is not heard, that is normal — «ההקלטה החלה» confirms that recording runs.
Records continuously from both cameras (R588: front 2560×1440 at 30 fps; R688: front 3840×2160 — 4K, upscaled from 2560×1440 — at 25 fps; rear 1920×1080 at 25 fps) in 1-minute files (factory setting; 3 or 5 minutes can be selected) to the Normal folder. The LED blinks slowly (1 s on, 1 s off).
Impact (G-sensor): if recording is running and the card is ready, a beep and a 30-second Event clip from both cameras. There is no pre-recording in the Event clip; its start may be delayed relative to the impact. Earlier footage may be available in the normal recording if recording was already running. An impact during a voice prompt or during another event clip is not saved separately. The threshold is set by G-Sensor Sensitivity.
Wi-Fi is off after start-up. To use the app (live view, files, settings), switch Wi-Fi on with the button — hold 3–9 s and release (Wi-Fi rules: section 5).
Ignition OFF — what happens next
A few seconds (about 2–5 s) after the ignition is switched off the camera says «מצב חניה» (parking mode; not heard if Volume is set to Mute) and switches Wi-Fi off if it was on — regardless of the parking settings.
About 15 s after the ignition is switched off (later if an event clip is being recorded at that moment) the camera chooses one of two behaviours according to the Time lapse recording duration setting. Without a working memory card it always switches off:
A. Parking without time-lapse (Time lapse = Off) — factory setting
The camera switches off about 15 s after the ignition is switched off. There is no voice prompt; the LED lights steadily for a few seconds during power-down and then goes out.
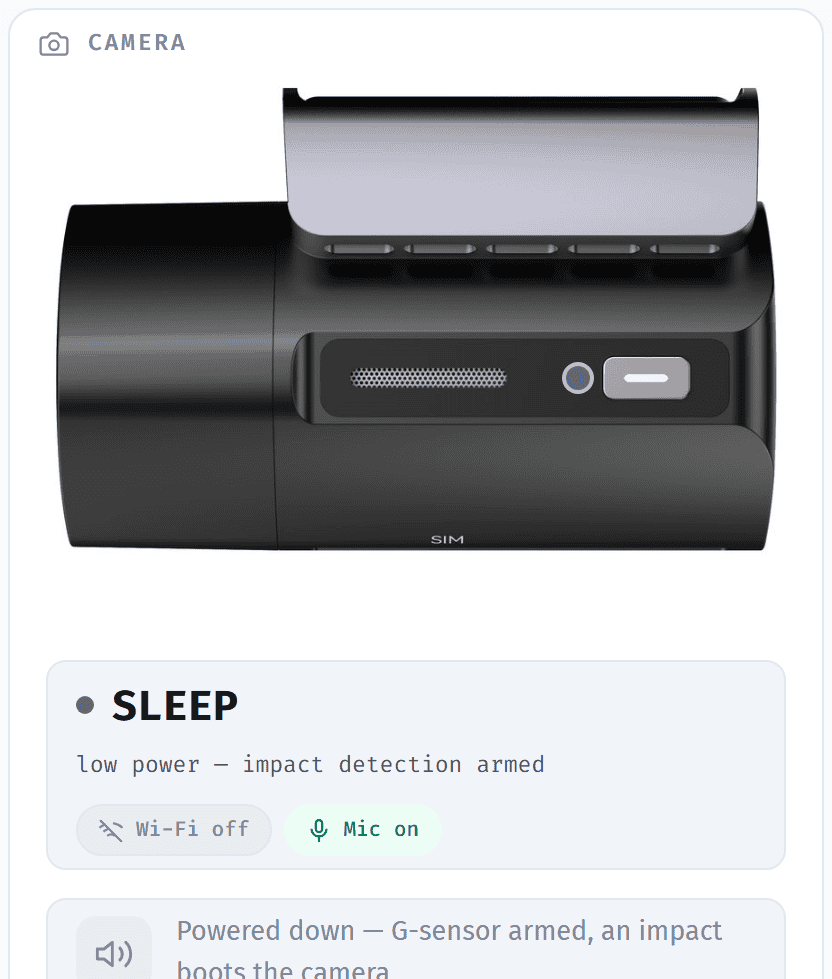
If Parking Monitor is not Off, the G-sensor stays armed while the camera is off. On an impact the camera starts up (about 10 s), plays «מצב חניה», records a 30-second clip from both cameras to the Event folder and switches off again. Recording begins only after start-up, so the moment of the impact itself may not be in the clip. If the ignition is switched on while this clip is being recorded, the camera restarts into driving mode when the clip ends.
With Parking Monitor = Off the camera stays off until the ignition is switched on. Nothing is recorded while the camera is off.
B. Parking with time-lapse (Time lapse = 15 Minutes / 12 Hours / 24 Hours)
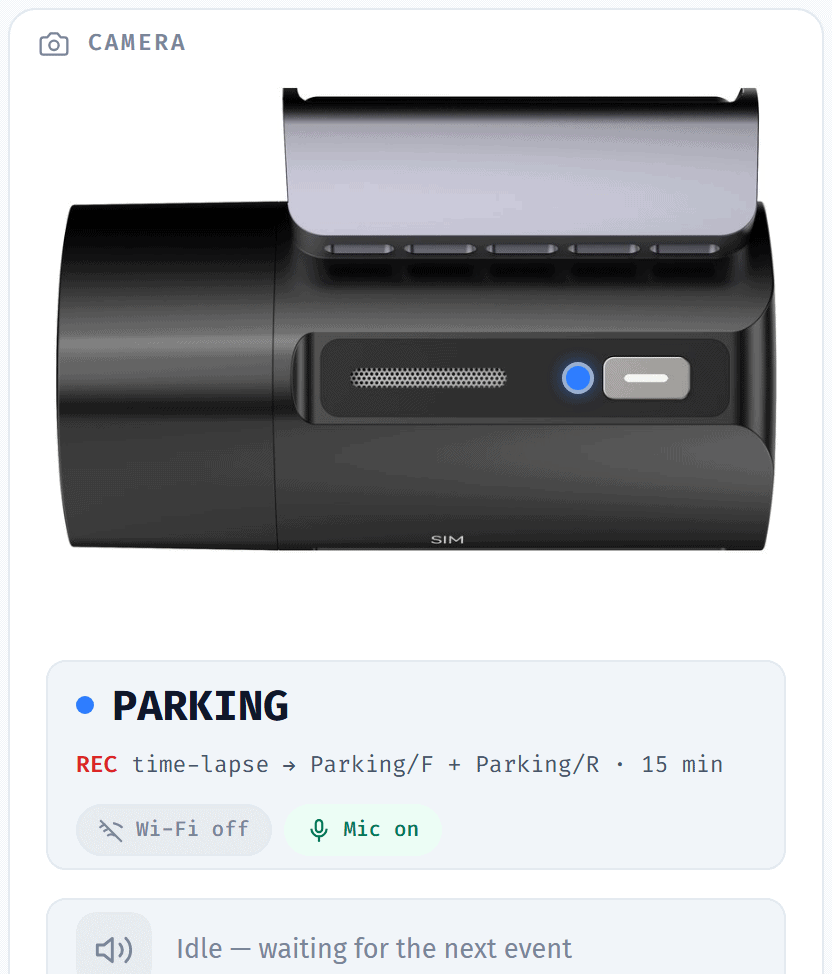
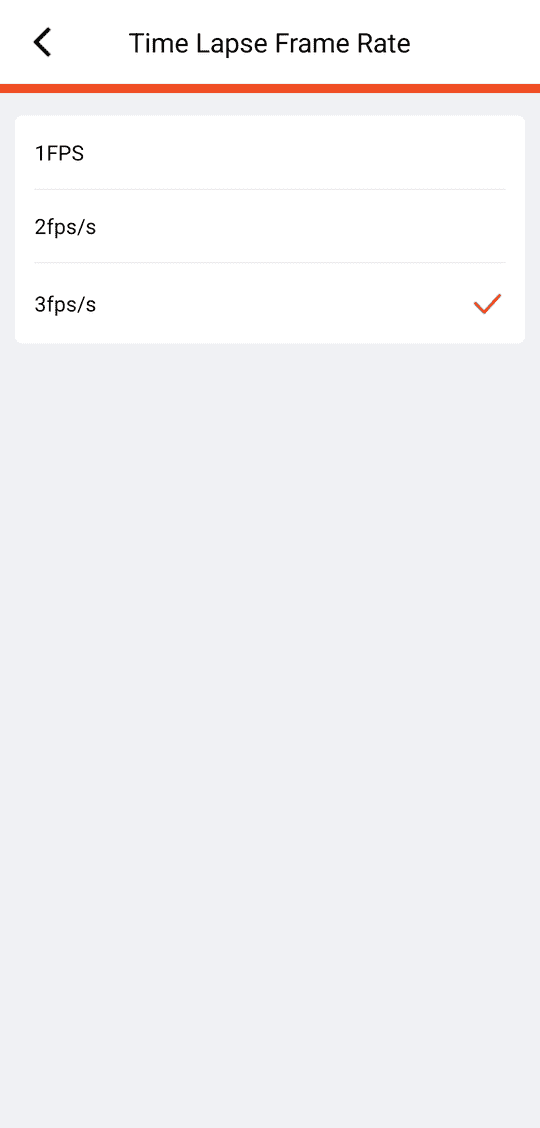
About 15 s after the ignition is switched off the camera says «צילום בחניה הופעל» (parking recording on) and records time-lapse at the Time Lapse Frame Rate setting (1 / 2 / 3 frames per second, factory 3; the setting applies to both cameras) to the Parking folder. The LED blinks slowly.
Impact during time-lapse: a beep, then a 30-second clip at the normal frame rate of each camera is saved to the Event folder, after which the camera returns to time-lapse — from then on at about 4 frames per second until the next restart. A second impact during those 30 s does not create a separate clip.
When the chosen time (15 min / 12 h / 24 h) expires, the camera switches off. If Parking Monitor is on, an impact can still wake it as described in A.
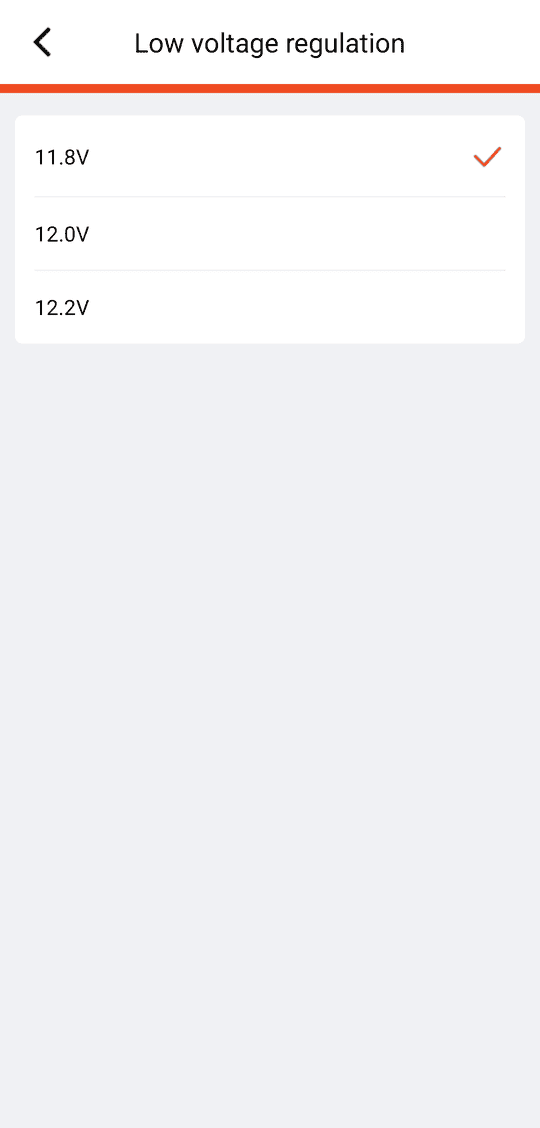
Battery protection (11.8 / 12.0 / 12.2 V) is active only during time-lapse parking with the 12 V hardwire connection. The camera averages the voltage, so it does not switch off instantly: when the voltage stays at or below the selected threshold, switch-off took about 1–1.5 minutes in our tests. A low-voltage event received during an impact clip is ignored; shutdown then depends on subsequent voltage checks and may be delayed further — it is not guaranteed immediately after the clip. After such a switch-off an impact will not wake the camera; it starts again when the ignition is switched on. This is not a guarantee of a specific running time or of the battery’s starting ability.
Without a memory card the camera switches off after 15 s even if time-lapse is enabled.
Ignition ON again
From time-lapse: the camera says «מצב נסיעה» (driving mode), restarts (about 10 s), plays the melody and «ההקלטה החלה», and continues normal recording. Wi-Fi stays off — switch it on with the button if you need the app.
From off: the camera starts as usual — melody, on some starts «מצב נסיעה», then «ההקלטה החלה».
If ignition returns before time-lapse or shutdown has begun (normally within about 15 s), normal recording can continue without the time-lapse restart; «מצב נסיעה» is heard (unless Volume is Mute).
✔ Time-lapse parking keeps the camera running and draws power from the vehicle battery. For long parking or an older battery choose Low voltage regulation 12.0 V or 12.2 V, or use 15 Minutes.
Driving mode: LED blinks (1 s on, 1 s off), both cameras recording; Wi-Fi shown on after it was switched on with the button
Time-lapse parking: «צילום בחניה הופעל», Time Lapse Frame Rate (factory 3 fps, both cameras) to the Parking folder
Camera off (sleep) — G-sensor armed with Parking Monitor on
Battery protection: voltage at or below the selected threshold — switch-off after about 1–1.5 minutes; camera off until ignition on
Voice prompts (Hebrew)
The camera confirms the main changes of state with a short Hebrew phrase or a beep (power-down in parking, the battery-protection shutdown, Wi-Fi off with the ignition and the end of the time-lapse timer are silent). Whether a prompt is heard depends on the Volume setting (Mute = no prompts):
Prompt
Meaning
When
♪
Power-on melody
Every start-up
ההקלטה החלה
Recording started
After start-up; when recording is started from the app
מצב חניה
Parking mode
A few seconds (about 2–5 s) after ignition off; also when the camera wakes up after an impact while parked
צילום בחניה הופעל
Parking recording on
Time-lapse parking started (about 15 s after ignition off)
מצב נסיעה
Driving mode
Ignition on after parking
ההקלטה הופסקה
Recording stopped
Recording stopped from the app
אירוע חירום, ההקלטה החלה
Emergency event, recording started
Short press of the camera button (emergency clip)
תקלה בכרטיס הזיכרון
Memory card error
No card, or the card is not ready (for example being formatted automatically)
מאתחל את כרטיס הזיכרון
Initialising the memory card
Formatting has started — from the app (Format Device) or automatic formatting of an unsupported card
יש לסנכרן את השעון עם הטלפון
Synchronise the clock with the phone
After switching on, if the camera clock is not set (up to three times). Connect SAMSONIX PRO — it sets the time automatically
♫
Beep — impact detected
G-sensor impact while driving or parked; button press during time-lapse
Other prompts: «וויפיי פעיל» / «וויפיי כבוי» — Wi-Fi on / off (button, app, and the automatic switch-off after 5 minutes); «ההקלטה פעילה» / «ההקלטה כבויה» — sound recording (microphone) on / off; «משחזר הגדרות יצרן» — factory reset; «התמונה צולמה בהצלחה» — photo taken; «הווידאו ננעל» — video locked from the app.
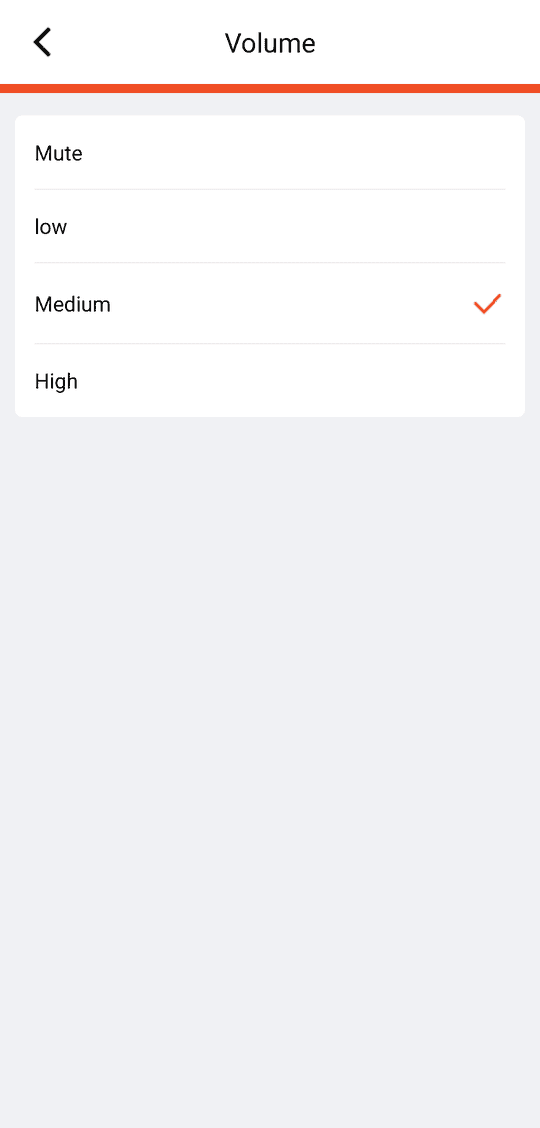
Voice prompts and beeps follow the Volume setting (Mute / low / Medium / High); with Mute no prompts are heard at all.
7 Recordings on the memory card
Video is stored on the card as MPEG-TS files (extension .TS); photos as .JPG. The files play in VLC and most media players when the card is read on a computer.
Folder
Content
Normal/F, Normal/R
Continuous driving recordings in 1-minute segments (factory setting; 3 or 5 minutes selectable). Oldest files are overwritten when the space is used up (loop recording).
Event/F, Event/R
Impact events (30 s) while driving, during time-lapse parking and after wake-up from sleep, plus manual events from the button. Kept in a separate 20 % area of the card and not removed by normal loop recording; they are overwritten by newer events and erased by formatting — copy important files.
Parking/F, Parking/R
Time-lapse parking recordings only (files with the _t suffix).
Photo/F, Photo/R
Photos taken from the app.
F = front camera, R = rear camera. Both cameras record at the same time into separate files; the names and start times of corresponding front and rear recordings may differ.
File name: YYYY_MM_DD_HHMMSS_NN.TS — date and time when the segment started, in year_month_day order: 2026_09_18_143012_00.TS = 18/09/2026, 14:30:12. Time-lapse parking recordings (reduced frame rate) carry the suffix _t, e.g. 2026_09_30_144722_00_t.TS.
Loop recording. Normal and Parking recordings share about 79 % of the card; Event has its own 20 %. When an area is full, the oldest file in that area is deleted to make room. Nothing needs to be done by the user.
Date, time and the Samsonix logo are stamped into the video image (see «Stamp on the video» below).
Stamp on the video
Every frame of every recording carries a stamp in the bottom-left corner: the logo samsonix R588 (on the R688: samsonix R688) and the date and time. The camera writes the date in year-month-day order: 2026-09-30 15:48:51 = 30/09/2026, 15:48:51. The stamp is part of the video image and cannot be removed afterwards; the time comes from the phone (see «Connecting to your phone»).
Stamp logos: R588 front (1440p) and rear (1080p); R688 front (2160p, upscaled) and rear (1080p)
Bottom-left corner of a real R688 front recording: logo and stamp 2026-09-30 15:48:51 (= 30/09/2026)
Viewing, downloading and deleting in the app
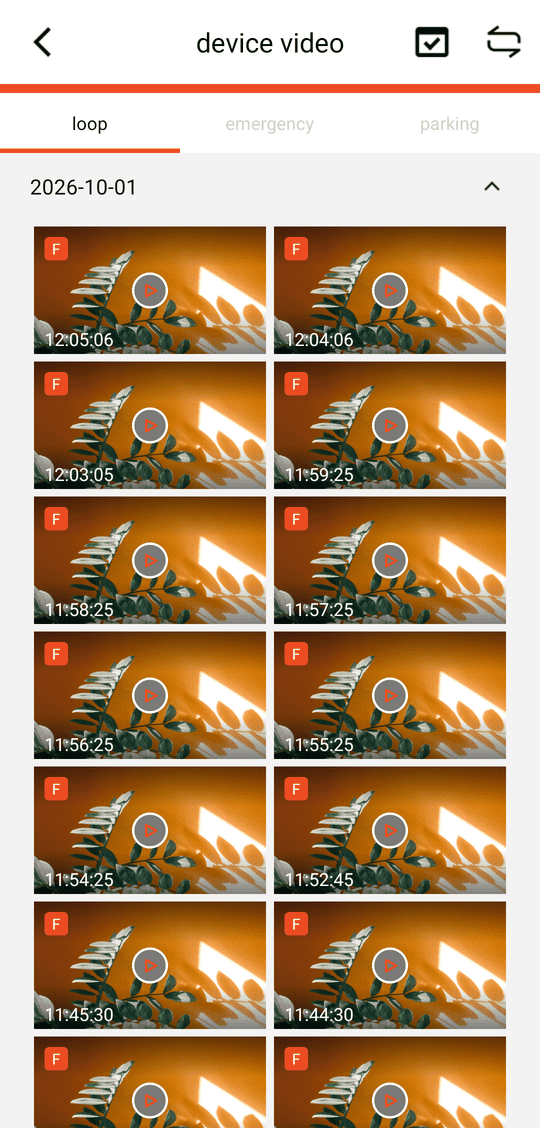
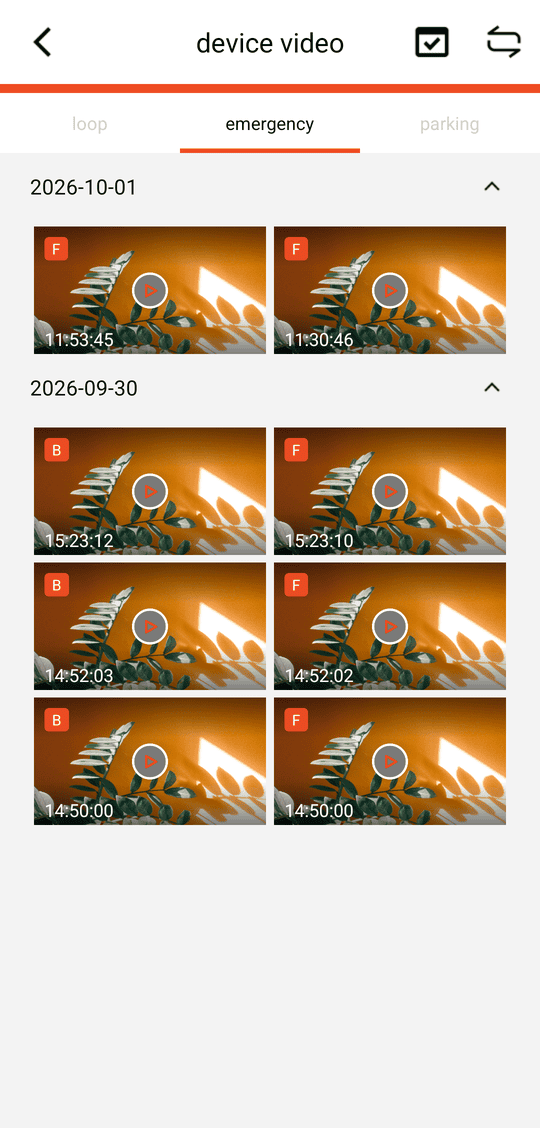
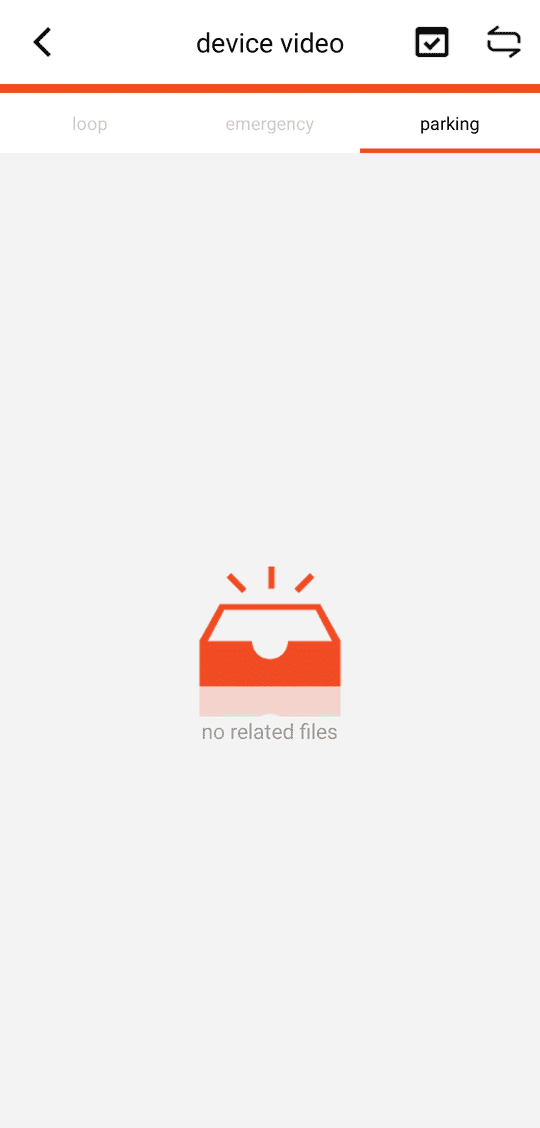
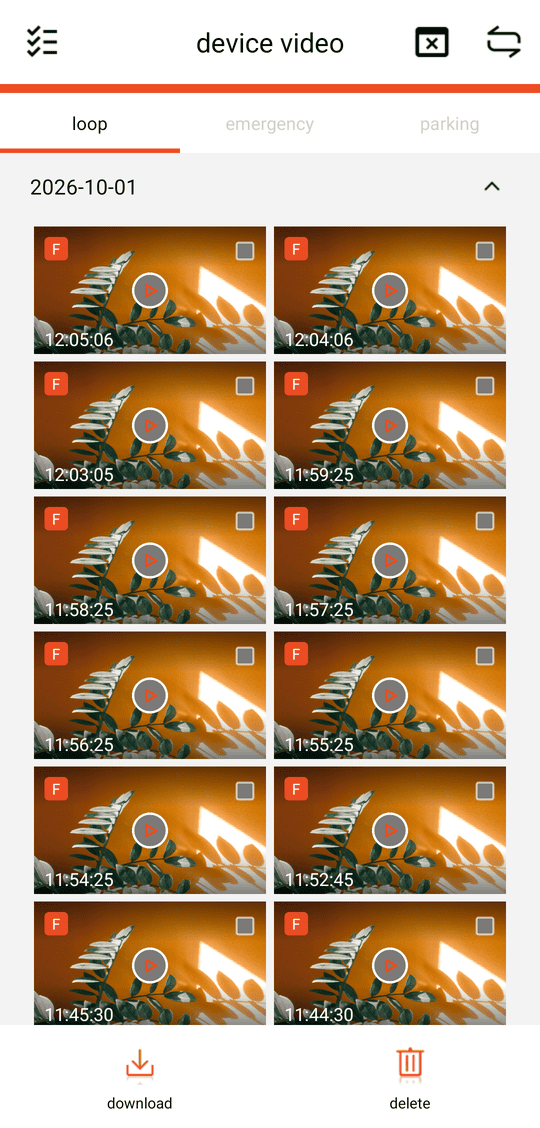
On the device screen tap device video. Three tabs: loop = continuous driving recordings (Normal folder), emergency = impact, wake-up and button events (Event folder), parking = time-lapse recordings (Parking folder). Each recording appears twice — F (front) and B (back / rear camera) — with its start time, grouped by date.
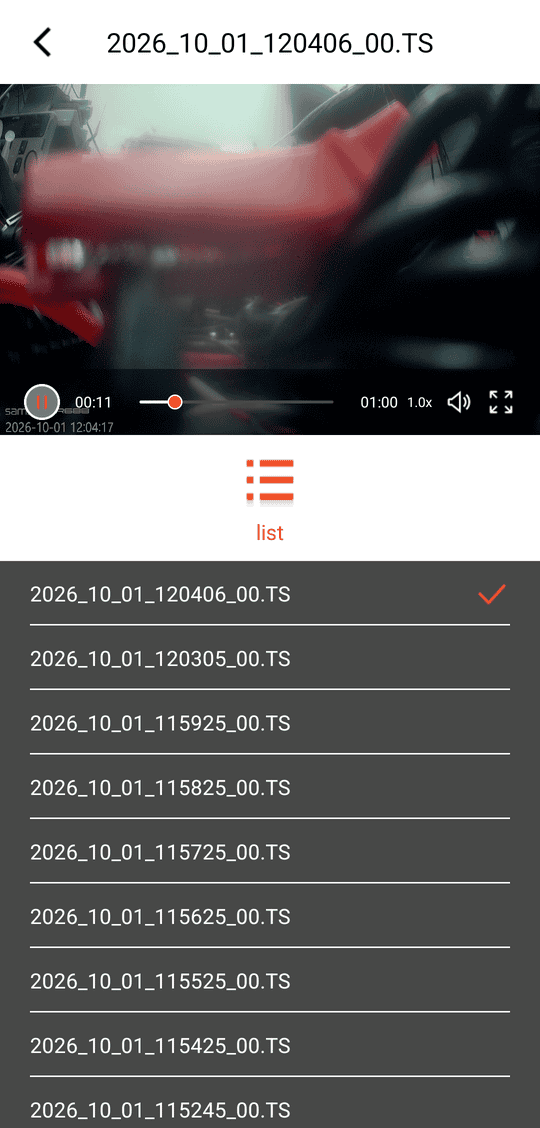
Tap a thumbnail to play it over Wi-Fi. The file name (for example 2026_09_30_152713_00.TS — recorded 30/09/2026 at 15:27:13) is shown in the title and the list under the player lets you jump to the neighbouring files.
Tap the selection icon (the tick box at the top right, next to the history icon) to enter selection mode, tick one or more files and choose download (copy to the phone) or delete (remove from the card permanently).
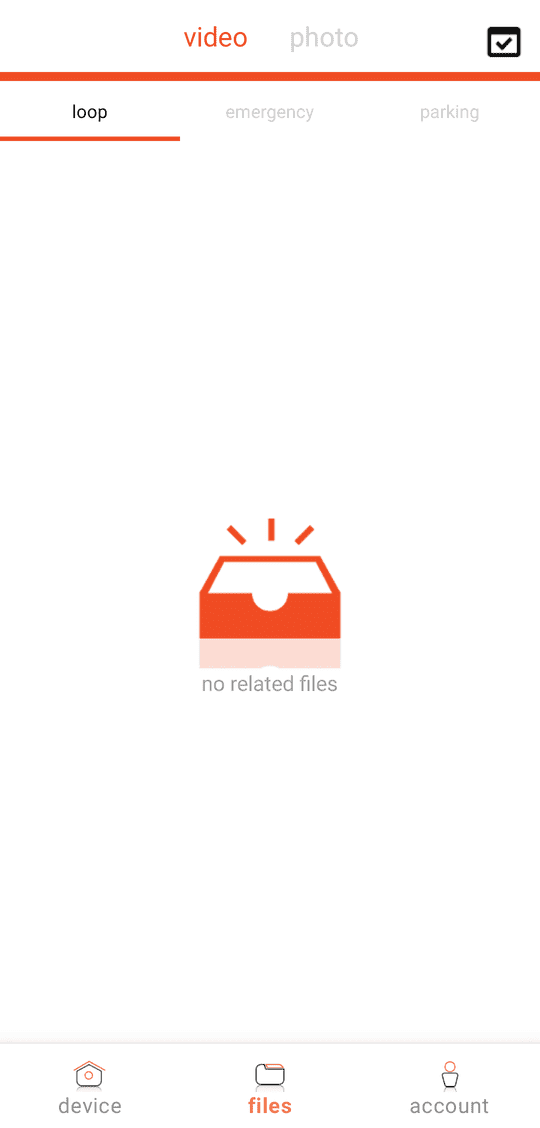
Downloaded files are kept in the files tab (video / photo, with the same loop / emergency / parking groups) and can be watched without the camera. There is no per-file lock: Event files are protected by the separate Event area on the card.
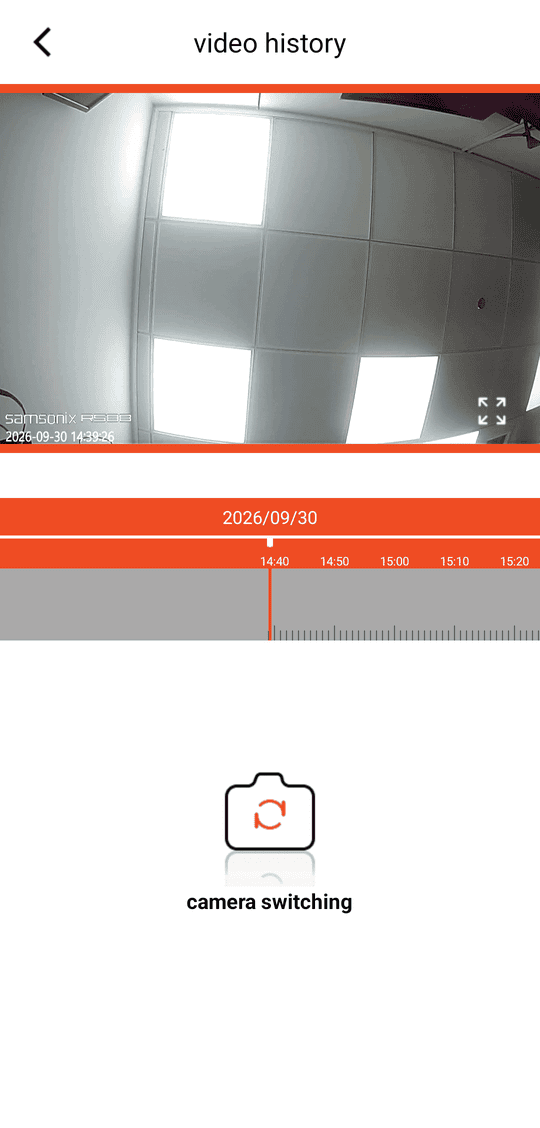
video history (icon at the top right of device video) shows the recordings on a timeline by date. Photos taken with the camera icon in preview are listed under device photo.
Wi-Fi transfer is slower than a card reader. To save many files, take the card out and copy them on a computer (the .TS files play in VLC and most media players).
device video → loop: continuous recordings (Normal folder); F = front, B = back camera
emergency: impact and button events (Event folder)
parking: time-lapse recordings (Parking folder)
Playback of a file; the list below jumps to neighbouring files
Selection mode (tick box at the top right): tick files, then download or delete
video history: recordings on a timeline by date
files tab: downloaded video / photo stored on the phone
device photo: photos taken with the camera (Photo folder)
8 Settings
Settings are changed in the app (SAMSONIX PRO → Settings) while the phone is connected to the camera. Menu names below are as shown in the app (English). The Factory column gives the factory values of firmware 1.0.2.0.20261010 — the same as in 1.0.1.9.20260930 (verified in the firmware settings file and live on the camera); a factory reset restores these values.
Setting (as in the app)
Options
Factory
What it does
change wifi name
—
R588_XXXXXX / R688_XXXXXX
Name of the camera Wi-Fi network (SSID).
change wifi password
—
12345678
Wi-Fi password: 8 to 16 characters, entered twice. Use Latin letters and digits only.
Video resolution
2K+1080P / 4K+1080P
R588: 2K+1080P / R688: 4K+1080P
R588: front 2560×1440 at 30 fps (2K+1080P). R688: front 3840×2160 (4K, upscaled from 2560×1440) at 25 fps (4K+1080P). Rear 1920×1080 at 25 fps. Not adjustable.
Loop Recording Time
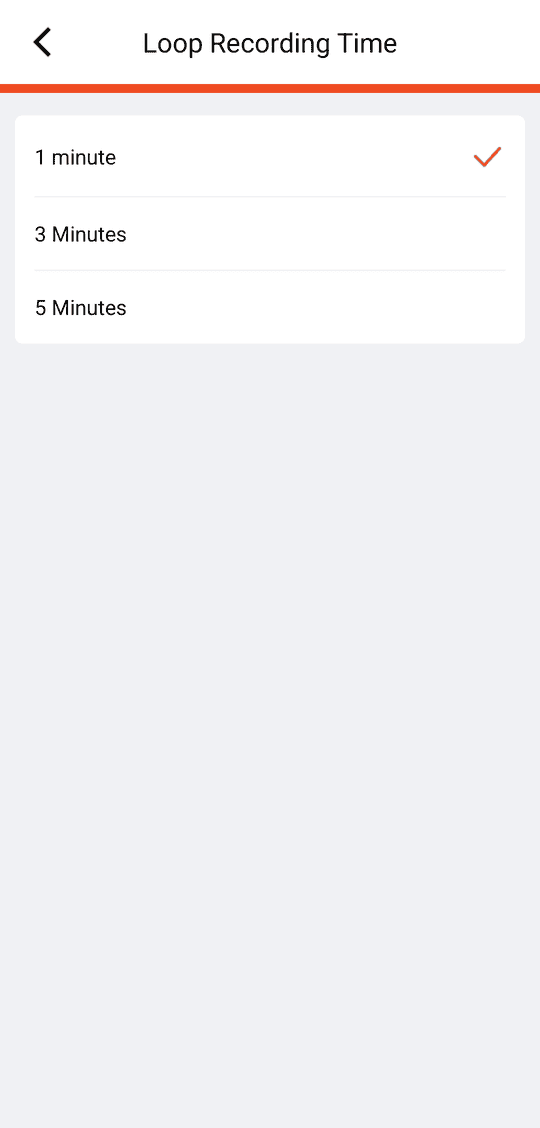
1 minute / 3 Minutes / 5 Minutes
1 minute
Length of each video segment in the Normal folder.
Record audio
On / Off
On
Record sound from the microphone.
G-Sensor Sensitivity
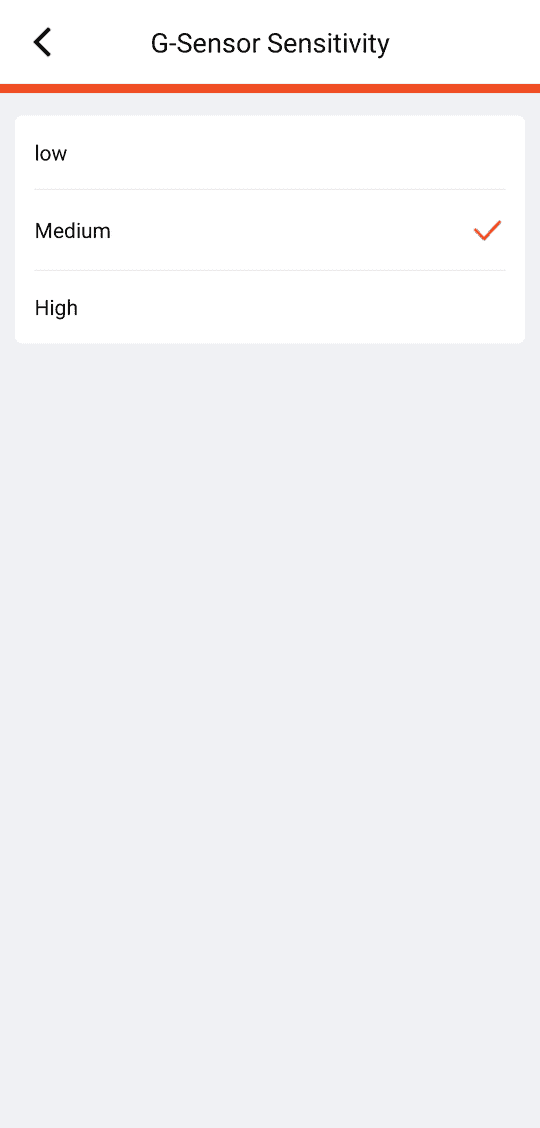
low / Medium / High
Medium
Impact threshold while driving and during time-lapse parking. High = more sensitive (more events).
Parking Monitor
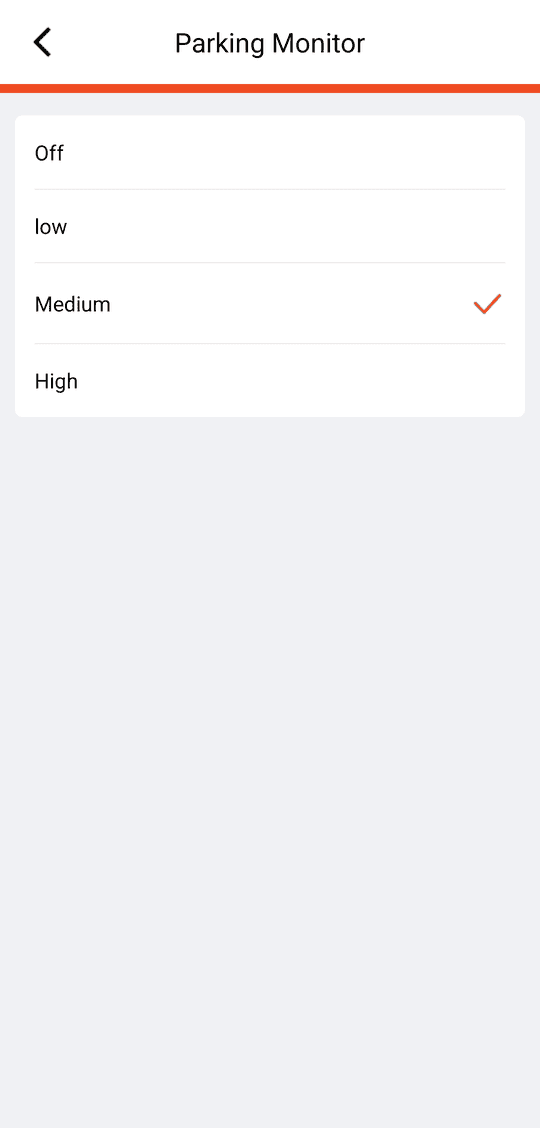
Off / low / Medium / High
Medium
Whether an impact wakes the camera while it is switched off in parking. Off = no wake-up. Does not affect time-lapse (section 6).
Time lapse recording duration
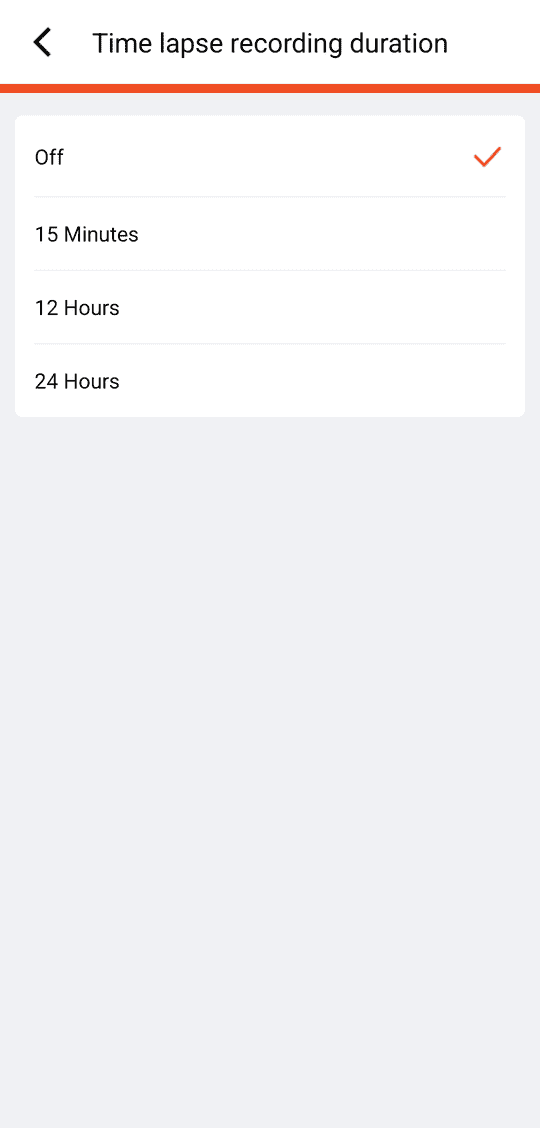
Off / 15 Minutes / 12 Hours / 24 Hours
Off
Time-lapse parking recording after the ignition is switched off, and for how long. Off = the camera switches off after 15 s (details: section 6).
Time Lapse Frame Rate
1FPS / 2fps/s / 3fps/s
3fps/s
Frames per second recorded in time-lapse parking (both cameras).
mirror display from left to right
Off / On
On
Mirrors the rear-camera image horizontally (left ↔ right). The switch always applies to the rear camera; the front image is not affected.
vertical reflection
Off / On
Off
Turns the front-camera image upside down (for a camera mounted upside down). The switch always applies to the front camera; the rear image is not affected.
Low voltage regulation
11.8V / 12.0V / 12.2V
11.8V
Battery protection threshold for time-lapse parking (section 6).
Speed unit
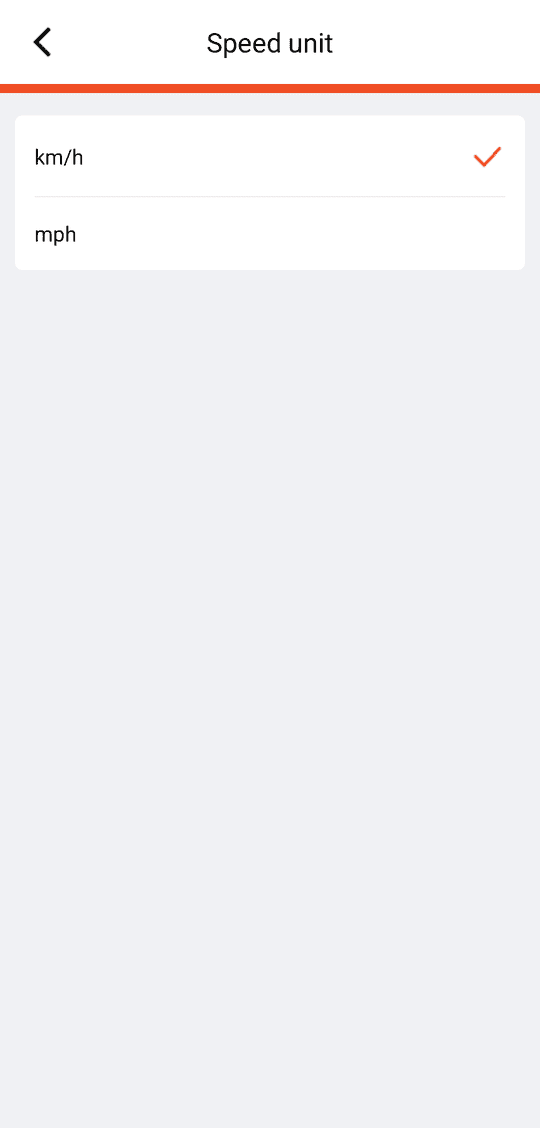
km/h / mph
km/h
Not used in this model (no GPS — the camera does not measure or record speed). Leave the default.
Volume
Mute / low / Medium / High
Medium
Speaker volume for voice prompts and beeps.
Format Device
—
—
Formats the card — all recordings are deleted (see section 4, «microSD memory card»).
Restore factory settings
—
—
Returns all settings to factory values and restarts the camera.
Firmware version
—
R588_261010
Installed firmware. Version 1.0.2.0.20261010 is shown as R588_261010 (R688: R688_261010).
Parking Monitor, Time lapse recording duration and Low voltage regulation take effect only with the 3-wire hardwire connection (section 4). «mirror display» changes the rear camera, «vertical reflection» the front camera.
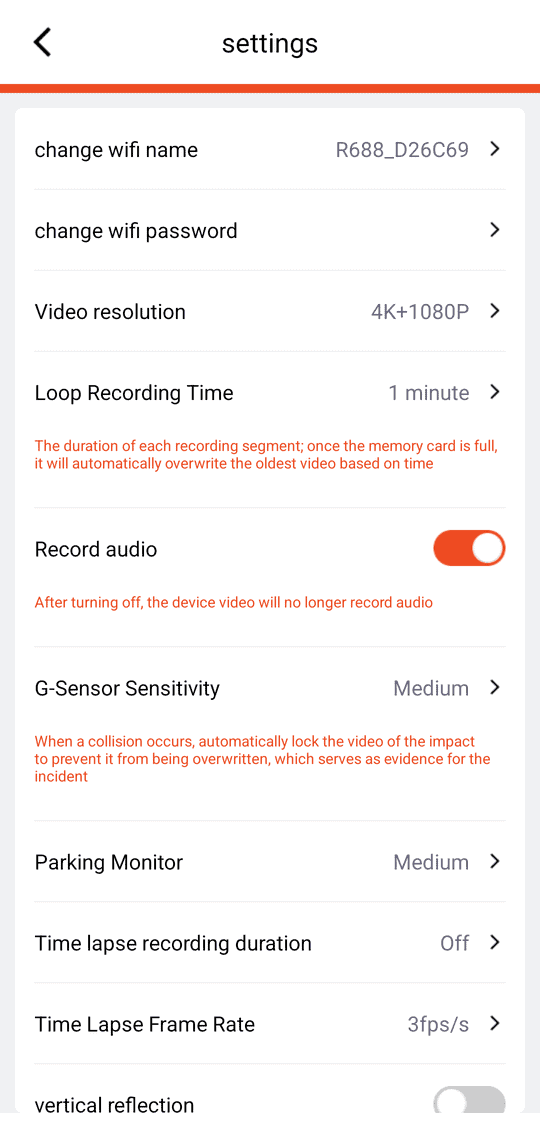
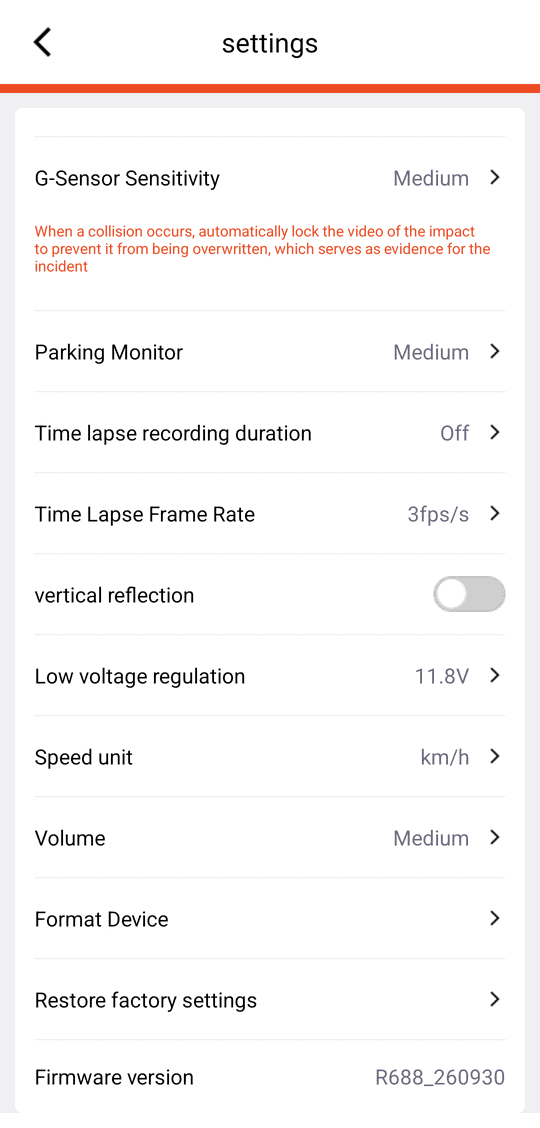
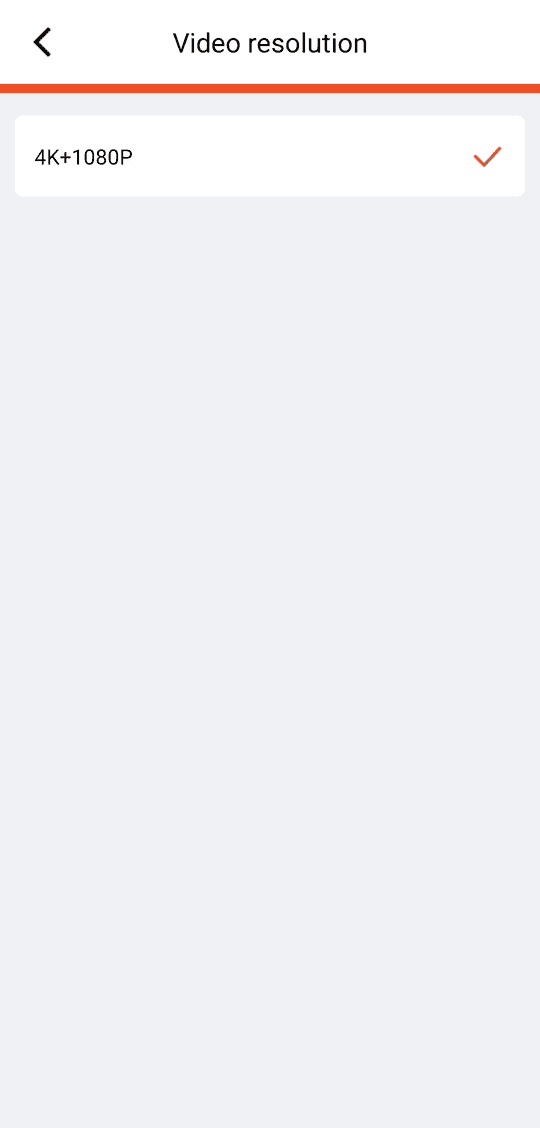
Screens below: SAMSONIX PRO (Android) connected to an R588 with firmware R588_260930; with firmware 1.0.2.0 the screens are the same (only the firmware version line reads R588_261010). The R688 shows the same screens with its own name and resolution.
settings (top): Wi-Fi name / password, resolution, loop time, audio, G-sensor
settings (bottom): parking, time-lapse, mirror / flip, low voltage, speed unit, volume, format, reset, firmware
Video resolution: 2K+1080P on the R588; the R688 shows 4K+1080P (4K upscaled from 2560×1440)
The camera has no screen and no GPS. It is operated with the app and one button on the camera body; one LED shows the recording state. The button does not switch the camera on or off — power is controlled by the ignition (see «Operating modes»).
Press
Action
Short press (up to 3 s), then release
Lock video (manual event): beep, then «אירוע חירום, ההקלטה החלה» and a 30-second clip from both cameras saved to the Event folder (its own 20 % area, overwritten only by newer events). During time-lapse parking: beep only. Ignored during the first 5 s after start-up and while another event clip is being recorded. If no memory card is working, the voice prompt is still heard but nothing is saved.
Hold 3–9 s, then release
Wi-Fi on / off: press and hold the button for 3–9 seconds, then release — the camera says «וויפיי פעיל» / «וויפיי כבוי» (Wi-Fi on / off). This is the only way to switch Wi-Fi on: it does not switch on by itself at start-up or with the ignition. The action happens at the moment of release; a shorter hold locks the video instead; holding longer than 9 s resets the camera to factory settings. Automatic Wi-Fi switch-off: section 5.
Hold more than 9 s, then release
Factory reset: hold the button for more than 9 seconds and release — voice prompt, LED lights steadily, all settings return to factory values (including the Wi-Fi password 12345678) and the camera restarts.
The camera measures how long the button was held and performs the action when the button is released: up to 3 s = lock video, 3–9 s = Wi-Fi on/off, more than 9 s = factory reset. Thresholds from the firmware code.
LED
Meaning
Off
Camera switched off, or not recording (for example no memory card).
Slow blink (1 s on, 1 s off)
Recording — driving or time-lapse parking.
Steady on
Powering down (parking) or factory reset in progress.
The LED alone cannot identify why recording has stopped (no card, card error, recording stopped in the app); it does not show the Wi-Fi state either.
10 Troubleshooting
Problem
What to do
Camera does not switch on
Check the power cable and its connection (fuse, B+ / ACC / GND). Replace the cable with the original Samsonix cable if damaged.
Camera says «תקלה בכרטיס הזיכרון» (memory card error) / app shows «please insert a tf card» although a card is inserted
This message does not identify the cause: the card may be absent, not ready (for example being formatted automatically) or faulty. Wait until recording starts (LED blinking); if it does not start, check or replace the card — see section 4, «microSD memory card».
Camera does not record
Card problem — see section 4, «microSD memory card». Also check in the app that recording was not stopped manually (Recording → start).
Video is not clear
Dirty lens or windscreen: wipe the lens with a lint-free cloth and clean the glass inside and outside.
Image too bright / over-exposed
The lens points at the sky: lower the lens angle so that the sky takes about the top third of the image.
Camera freezes at start-up after hardwire installation
The B+ / ACC / GND wires may be swapped or short-circuited. Disconnect the power, check the wiring with the installer, then reconnect the power and check whether the camera starts normally.
No parking mode — the camera switches off with the ignition
Check that the camera is connected with the supplied 12 V cable with the ACC wire (B+ / ACC / GND). On 5 V USB power or without ACC the camera cannot detect the ignition state: there is no parking mode, and when power is removed recording stops.
Camera switches off 15 s after the ignition is off
This is normal with Time lapse = Off (factory setting): about 15 s after the ignition is switched off the camera switches off. It starts again when the ignition is switched on and, if Parking Monitor is not Off, on an impact. For parking recording set Time lapse recording duration to 15 Minutes / 12 Hours / 24 Hours (section 6).
Camera Wi-Fi network is not visible
Wi-Fi does not switch on by itself: it is off after start-up and when the ignition is switched on, it switches off about 2 s after the ignition is switched off and within about 5 minutes with no phone connected. Hold the button 3–9 s and release — «וויפיי פעיל» (see section 5).
App does not find the camera
Make sure the phone is connected to R588_XXXXXX / R688_XXXXXX (password 12345678) and not to another network; allow the phone to stay on a network without internet. Forget the network and connect again, then restart the app.
Camera off during time-lapse parking before the time expired
Battery protection may have switched the camera off (voltage at or below the threshold for about 1–1.5 minutes); it comes back with the ignition. Also check the power connection and the memory card. Choose 11.8 V for the longest recording, or have the vehicle battery checked.
No event clip after an impact while parked
Check that Parking Monitor is not Off (wake-up from sleep) and raise G-Sensor Sensitivity (impacts during time-lapse). A second impact within 30 s of the first does not create a separate clip. After a battery-protection shutdown impacts do not wake the camera.
Button pressed, prompt heard, but no clip in Event
If the memory card is not working (or recording is stopped), manual lock records nothing although the prompt is played — see section 4, «microSD memory card».
No voice prompts or beeps
Check that Volume is not set to Mute.
Wrong date or time on the recordings
Connect SAMSONIX PRO to the camera — the app sets the camera time from the phone automatically at every connection. Check that the date and time on the phone are correct.
Camera does not respond
Hold the button for more than 9 s and release (factory reset), or disconnect and reconnect the power. If the problem remains, contact support.
11.8 / 12.0 / 12.2 V, active in time-lapse parking
same as R588
Parking recording
Time-lapse 1 / 2 / 3 fps (factory 3 fps) for 15 min / 12 h / 24 h; impact during time-lapse and impact wake-up save a 30 s Event clip
same as R588
Screen
None (operated via the app)
same as R588
GPS
None
same as R588
Processor / memory
GK7206 / 128 MB
same as R588
Firmware
1.0.2.0.20261010 (shown in the app as R588_261010 / R688_261010)
same as R588
Manufacturer data
The values in this table are taken from the hardware manufacturer’s specification.
Item
Value
Lenses
Front F1.8, 140°; rear 2 MP, F2.0, 130°
Microphone / speaker
Built-in microphone and speaker
Backup battery
Built-in coin cell battery
Power
DC 5 V / DC 12 V, Type-C connector (manufacturer’s data). 12 V through the supplied 3-wire cable — all modes; 5 V USB — driving mode only, no parking mode
Memory card
microSD 8–512 GB, Class 10 / U3
Housing
Aluminium + PC + ABS
Operating conditions
−20 … +70 °C, humidity 0–90 % non-condensing
Dimensions / weight
70 × 38 × 36 mm
Warranty
12 months
12 What’s new in firmware 1.0.2.0
Firmware 1.0.2.0.20261010 (R588 and R688) replaces 1.0.1.9.20260930. What changes for you:
Wi-Fi switches on only with the button. Wi-Fi stays off after the camera starts and when the ignition is switched on. To connect the phone, hold the button 3–9 s and release — «וויפיי פעיל». In 1.0.1.9 Wi-Fi switched on by itself in driving mode.
New button timings: Wi-Fi on / off — hold 3–9 s (was 3–5 s); factory reset — hold more than 9 s (was more than 5 s). A press of up to 3 s still locks the video (section 9).
Formatting voice prompt is back: when the card is formatted — from the app or automatically — the camera says «מאתחל את כרטיס הזיכרון» (initialising the memory card).
Not changed: the settings and their factory values, the ignition and parking timings, the parking modes (switch-off, time-lapse, impact wake-up, impact clips during time-lapse), battery protection, recording and the card folders. Wi-Fi still switches off about 2 s after the ignition is switched off and after about 5 minutes without a connected phone.
✔ To update a camera that has older firmware, follow the separate Firmware update guide (Firmware_Update_R588-R688_EN). A full firmware update returns all settings to factory values — note your Wi-Fi name and password changes beforehand.
13 Warranty and support
Warranty terms
When buying the camera, ask the dealer to fill in the warranty card below.
Keep the warranty card as proof of warranty; a lost card is not reissued. The model on the card must match the product, otherwise the warranty is void.
The warranty period is 12 months from the date of purchase.
Scratches, damage to the housing and other cosmetic wear are not covered by the warranty.
After the warranty period Samsonix continues to provide service; parts, inspection and shipping are charged to the customer. Samsonix reserves the right to interpret and amend these terms.





 234
234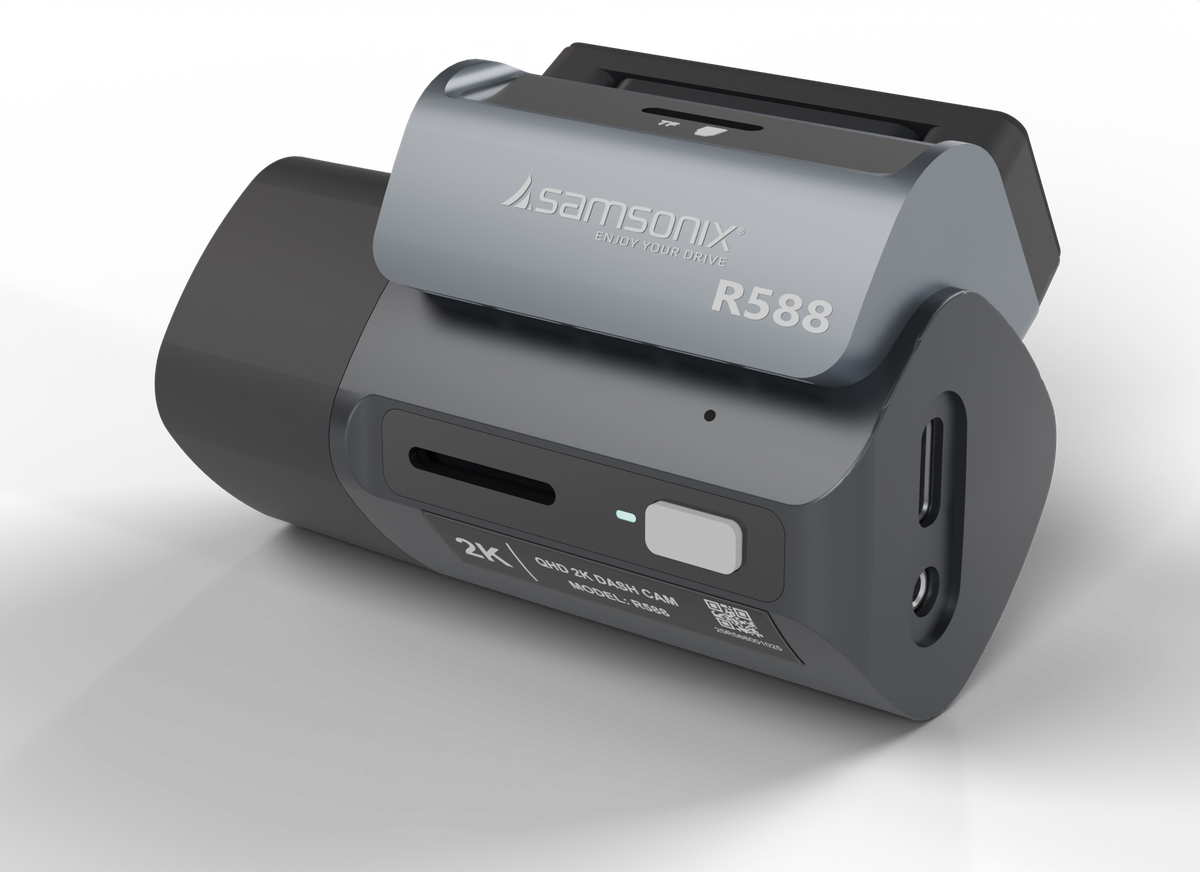 23457
23457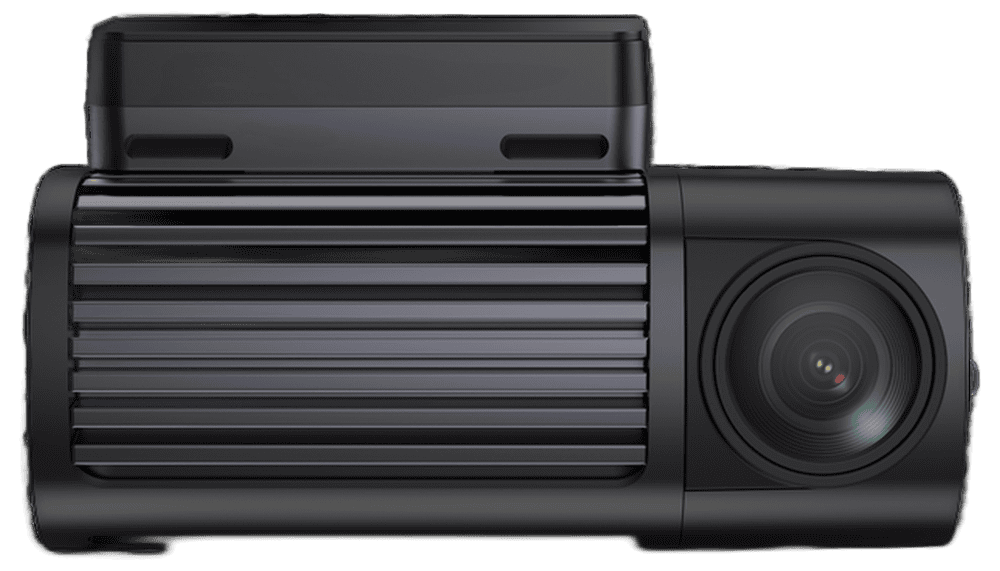 1
1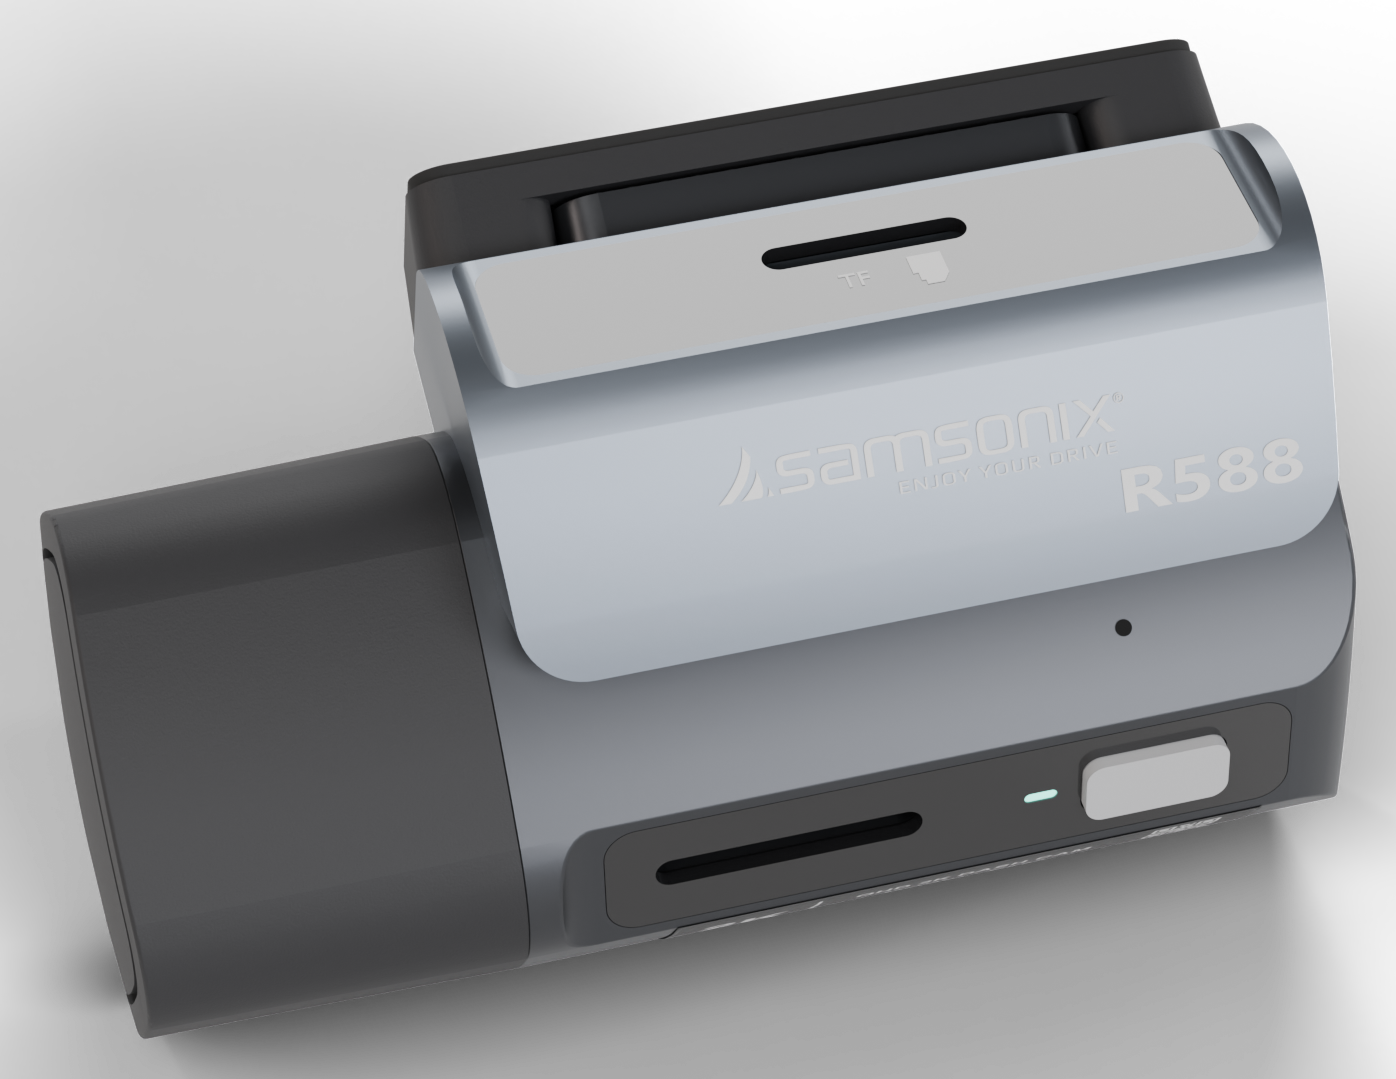 6234
6234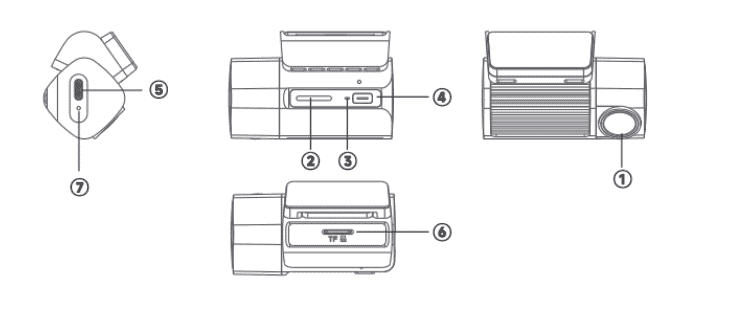
 Lens
Lens